NickieB
Members
-
Joined
-
Last visited
Everything posted by NickieB
-
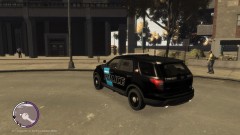
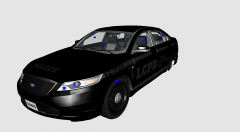
From the album: New Release
Available on GMC - http://www.gta-modding-chest.com/database/311-2013-ford-explorer-code-3-21tr-plus/index.html -
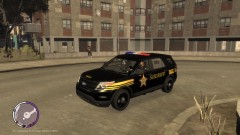
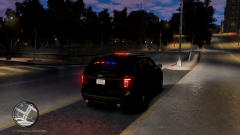
From the album: New Release
Available on GMC - http://www.gta-modding-chest.com/database/311-2013-ford-explorer-code-3-21tr-plus/index.html -

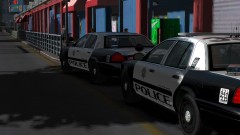
From the album: New Release
Available on GMC - http://www.gta-modding-chest.com/database/311-2013-ford-explorer-code-3-21tr-plus/index.html -
-
Are they both within the hierarchy of the car being exported? and are they above the windows in the hierarchy? they should go right under chassis_L2 or chassis_L1 depending on the car model being used. Make sure they are under and not within chassis_L1 or L2 I'm curious now, what type of vehicle needs two Vistas?
-
If its missing a wheel and the trunk when you spawn it something is probably setup very wrong in zmodeler. Check everything over and make sure its setup correctly
-
You can use that ELS mapping as long as the light is the same type as the other bars your trying to map. For instance you couldn't use Whelen Justice ELS lights to map a Whelen Liberty, it wouldn't look right. To add more than one, simply import more stuff. You'll probably run into a texture issue since you can only have one emerglights texture unless you rename it or combine the needed parts of the texture in photoshop and then re-map the needed parts in zmodeler.
-
GPM is the only place I've ever seen them uploaded. Thats where I got them from a very very long time ago. Maybe someone who has them will upload them for you. I don't think it should be a issue since they were uploaded unlocked so that would sort of void a distribution rule unless it was stated that they were exclusive to GPM.
-
Alter the settings which turn off the TA on activation of stage 3. You can do the same thing for the wig-wags by force setting the pattern to be T-02 at stage 3. All this can be done in the ELS CONFIG. This is what you need to edit.... [ SECL ] Type = drct DisableAtLstg3 = on (which will disable the secondaries upon activation of STG3) ForcePatForLstg = off (if you set this to on you can then force patterns for each respective stage below) PatId_Lstg1 = 0 PatId_Lstg2 = 2 PatId_Lstg3 = 3 [ WRNL ] Type = halo UseScnNotTkd = off ForcePatForLstg = on (with this on you will now be able to get the pattern for each stage below, stg 2 you can pick whatever but if you want the wig-wags off on stg 3 then set the ID for stg3 to 02 which is wig/wags off) PatId_Lstg2 = 0 PatId_Lstg3 = 2
-
 what is that lightbar? A Code 3/Tomar hybrid? Its like a Tomar Blade housing with x2100 modules and x2700 feet
 -
You can't really blame him or any other modeler for that. (I'm not saying you personally are blaming him, its more of a general statement)
-
I don't know about the ENB, I know nothing about ENB's so I can't help you there. As for ELS, you do it exactly how you would for IV, follow the included directions, it explains everything in there perfectly. The following is taken directly from the ELS USER GUIDE and is property of LtCaine, 1.6 – INSTALLATION Installing ELS may be done in a few easy steps: - Place the ELS.asi and ELS.ini files, as well as the ELS folder into your main GTAIV game directory (this is the same folder that houses the gtaiv.exe file); - unless you already possess the following files and they are more recent than the ones provided, place the dsound.dll and ScriptHook.dll files into your main GTAIV game directory; - if you do not already have any, download and install pro-ELS vehicle models to use with ELS; - open, configure the ELS.ini file and the ELS car configuration file(s) from the ELS folder to suit your needs, save them; and, - launch your game. Provided in the download is a VisualSettings.dat file. This file is a modified version of the original one used by GTAIV. This file serves to make the ELS lights larger, brighter, and in many cases, more realistic. Installing this file is purely optional. Though, should you wish to use it, you may simply add it to the “commondata” folder of your main GTAIV game directory, thus overwriting the original. It is always a recommended practice to make a backup of the original file.
-
Yea I just made my own for my recent Tahoe which was exactly what I wanted. I usually don't like telling people to ask these other modelers because I wouldn't want someone dropping my name for something specific and having people contact me for parts. Since the guy involved with this thread is going to ask and then another 20 people are going to do the same thing when they see this thread. I already get enough spam PMs asking for unlocked parts. I'm not mad at you or anything, just my opinion, its fine because people can just as easily get that info from the credits of released cars.
-
There are no Tahoe specific pushbars available. You'll have to make one or edit the ones that are currently available to fit. As for the crash, double check your hierarchy and make sure everything is setup correctly
-
 Sort of, wheels are wrong and its a 2010...
 -
yea, I'm almost 100% sure thats the problem because if you look, the graphics show up but the main body color doesn't. Its because that skin is setup to have the body color changeable in game. So you need a solid color skin
-
Well for one your missing the vehshare textures, which you need. I think I know why its transparent though, the skin your importing as police_sign_1 is transparent therefore making the car transparent. Open the template in photoshop and make the car white, then save the white skin as police_sign_1 and add the white skin as your police_sign_1 and then import the car, that should solve your issue. Or you can use any driver CVPI skin that has a solid color to it to test this out, just rename it to what I said above
-
Are you making sure that when you import sliced model and collision is checked and reuse materials is not. What version of zmod are you using, although I don't think that should matter. As for the lightbar, are you trying to import it with the CVPI? If so Bugs CVPI comes with emerglight textures that aren't compatible with the lightbar your trying to import. So import the textures for the lightbar before the CVPI textures and it should work. The emerglight textures aren't needed for the CVPI except for the divider which can easily be mapped to something else. Or just try and import the lightbar completely separate from the car to make sure it works by itself. Also make sure your "preferable textures" setting when you import is the same format as the textures you added to the mat editor
-
*I'm just speculating since I'm in no way affiliated with G17Media nor do I have any connection with LCPDFR so I don't claim this to be a official response but instead just my opinion* I highly doubt they would give permissions for something like that since that would be a good avenue for extra revenue for them to just do themselves. That would be like me going to some other major website and asking if I could take their logo's to make products that I would benefit from. Think about it from their angle, would you let your well known logos to some random person to make shirts that they would benefit from and you would only receive a margin when you could just do it yourself and get 100% of the profits? Especially with all of the places out there now that print stuff these days its so easy to get stuff made. I don't know how big the demand is for LCPDFR t-shirts or similar clothing but I'm willing to bet its something they've already thought about or who knows, maybe its in the works... Plus like tz71 said they have so many promoters out there already but thats not to say clothes isn't a good idea but then again maybe it wouldn't be worth it.
-
You need to look through the textures in the WTD and fine the one with that writing on it. Then export it and edit it in a photo editing program like photoshop. Erase the "G.STATE PATROL" from the texture and re import it into the WTD. If its part of a window template you'll have to redo the tint on that part since your erased some of it. If you don't see it anywhere in the WTD then chances are its not editable although I don't see how it couldn't be in the WTD. No need to try and contact him for something so simple
-
 haha, no there probably won't be any Explorers/Taurus's/Caprices publicly unlocked for a very long time (if ever). Those models are the new thing right now and people aren't exactly handing them out
 -
Its hopefully in its final stage of BETA testing - I had some crashing issues I had to work out with the car but I think its been resolved. Once I hear from some more of my testers that its good to go I'll be preparing the release file. It will be a exclusive for GTA Modding Chest
-
-
Just out of my own curiosity and I'm sure the curiosity of everyone else, what is your proposition? Would you mind sharing it with us? Maybe its a splendid idea...
-
Brilliant! Something people always wanted but no one ever thought of it... nice job, I don't know why this doesn't have more downloads...
- 4 comments
- 3 reviews