

AlconH
Members
-
Joined
-
Last visited
Everything posted by AlconH
-
There are two types of vehicles. ELS and Non-ELS. ELS enables the vehicle to have more realistic lights, however it causes the problem with the doors. NON-ELS, means that you can have the standard GTA police lights on a modded car, and you won't have any problems with the doors.
-
For some reason, I couldn't get it to work. The horn didn't make the traffic move, and the keys didn't work properly after they were changed.
-
-
Un-check the car in the hierarchy so that it disappears leaving the lightbar alone. Then use the Select > All tool, and click on the model. Now turn selected mode on by clicking the text toward the bottom of the screen. Now you can turn the car back on again in the hierarchy and use the move tool. It should now move the lightbar alone.
-
I may make some videos on creating wig-wags.
-
No, you need to select the LaunchGTAiV.exe I think... May be wrong though.
-
Yes, you don't touch the hierarchy. You find either the part or dummy named extra5/extra6 and click on it to attach it.
-
The lightbar can be left as it is. It's already mapped and ready to go. For the second lightbar will need to be attached to the first. For example, extra_1 will need to be attached to the extra_1 from the other lightbar.
-
Yes it would.
-
Correct. Click the attach tool, then click on the new taillight, then click on the extra5 dummy/light in the model.
-
It depends, if you want them to be wig-wags then you attach them to extra5 and extra6.
-
No you don't need to attach the lightbar to anything.
-
No the merge tool is for merging multiple .z3d files. If you have the lightbar in one .z3d and your current progress in another, you can use the merge tool to merge them together instead of wasting your time importing and exporting.
-
No, I was replying to NickieB, just ignore that. Yes, just use the merge tool and select both the parts.
-
Or you can just use the merge button.
-
You either need to re-name, or merge the parts that have the same names.
-
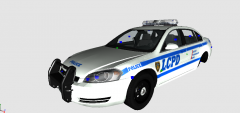
@Colombia123, that's the car in the latest seasons, as stated in the description, this one is based on the first 3 seasons.
- 38 comments
- 8 reviews
-
It isn't hard to spoof an email address. Anyone could have sent that email. What exactly is it asking you to do? I get them all the time, and I play along with them sometimes.... They will end up asking you for your personal info, but will convince you that they are legitimate first.
-
Support is no longer being offered for LCPDFR, hence the locked support section. Please search the forums for a solution to your problem. It's been solved many times before.
-
Surely it's not official unless LCPDFR/Zmodeler themselves say so...... Good idea though, I'll probably be here often.
-
-
Harper, I'll send you that in a second.
-
 Hmm.... I guess I could. I'll have to contact the original owner first though.
 -
I agree with Hunter. Laptops can be a pain in the ass to repair, they often overheat easily, and the majority of the parts cannot be upgraded so you will have to buy a new laptop once technology advances. If you were to buy the parts for a desktop individually, I can assure you that you will save lots of money, since laptops are often overpriced and you can be sure that buying the parts yourself will allow you to shop around and find the best value for your components.
-
We don't support cracked copies. Sorry.