Skip to content
View in the app

A better way to browse. Learn more.

LCPDFR.com

A full-screen app on your home screen with push notifications, badges and more.

To install this app on iOS and iPadOS
  1. Tap the Share icon in Safari
  2. Scroll the menu and tap Add to Home Screen.
  3. Tap Add in the top-right corner.
To install this app on Android
  1. Tap the 3-dot menu (⋮) in the top-right corner of the browser.
  2. Tap Add to Home screen or Install app.
  3. Confirm by tapping Install.

[DEV] 2011 Ford Crown Victoria Police Interceptor (CVPI) 1.7

21 Screenshots

======================================================

2011 Crown Victoria Police Interceptor - Development Resource
by Murphy

======================================================

I have never been truly satisfied with Crown Victoria modifications for Grand Theft Auto IV and V, so I set out to make a new standard in the modding community.

I present to you, the "new" 2011 Crown Victoria Police Interceptor! A highly accurate and fully functional representation of the car for GTA V!... And it is an open development resource!

Most development resources of the CVPI for GTA IV, GTA V, etc, are pretty good; however, they are very inconsistent with one another. Whether it be how the lights look, the model quality, the textures, or how the model functions.

This model takes the best from CVPI models, along with brand new components I have worked on, and puts them all into one! - Forming a near photorealistic 2011 CVPI for your use.

===============
Features & Fixes
===============

  • Full level of detail modeling (LOD), including L0, L1, L2, L3, L4
  • Photorealistic headlights, tail lights, turn signals, dash lighting
  • Frame retexture and texture fixes
  • Door hinge alignment for proper opening and closing
  • Driver's door re-alignment to fix minor offset from original conversion
  • Accurate dashboard trim & colors
  • Accurate interior cloth seats
  • Accurate dark grey/black floor
  • Accurate steering wheel
  • Full, custom collisions
  • Breakable windows
  • Color changeable body panels, indlucing under the hood and trunk (most miss this feature)
  • Custom dirt mapping
  • 3D engine model (with the 2004 engine cover)
  • Accurate side trim for the 2011 model year

=======
Credits
=======

I would like to thank the following individuals for their work that has contributed to this development resource:

  • Murphy - Lead developer, part modifications, custom modeled components, testing, UV mapping, features & fixes
  • Original Light - CVPI expertise, modeling contributions, BETA tester
  • Lundy - Door handles, CVPI expertise, CVPI parts from his models, mod tester
  • Yard1 - Encouragement, support, and modding techniques
  • Netman - Encouragement & support
  • Cj24 - Publisher of the original model for IV & template, including headlight modifications & misc changes from F5544's release
  • KevinDV - Work on the original model & grille
  • Ubisoft - Driver: San Francisco Ford Crown Victoria parts, including base model & first person interior
  • BxBugs123 - Headlight textures & expertise
  • OfficerUnderwood - CVPI parts from his DEV resource, mainly the headlights, grille, dash
  • F5544 - Initial GTA IV conversion
  • Schaefft - Some interior components and initial seat model that was modified into 2011 variant

=============
Things to know
=============

  • If you use this resource, please credit those mentioned in the credits, as well as Murphy.
  • When looking backwards, the camera looks through the headrests.
  • Gauges are inaccurately calibrated. This cannot be fixed in the GTA V game engine yet.
  • Rear door cards are not 100% accurate. The upper portion is slightly off.
  • Engine model is not 100% accurate. - May be improved in a future update.
  • Do not reupload this resource without permission from Murphy

=======
Thanks
=======

Thank you for downloading this resource. I hope that you use this in your future modifications, as well as refer this to other mod creators in order to improve the quality of all CVPI mods.

=================================
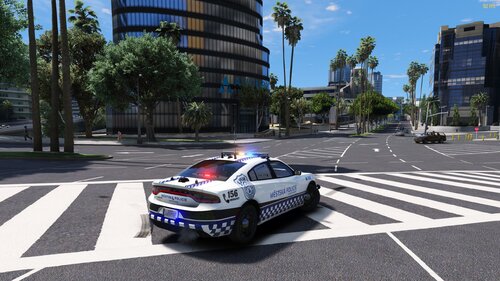
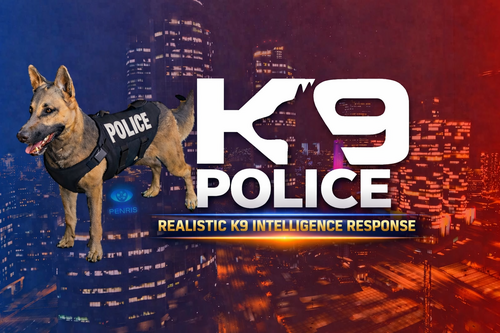
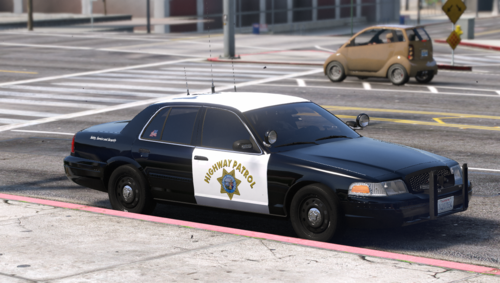
Check out these other DEV resources!
=================================


What's New in Version 1.7

Released

PLEASE NOTE: Some screenshots on this download page may not accurately represent the latest version of this development resource. Please view the download files in Zmodeler 3 for an accurate representation.

  • Missing textures in archive added - Minor update 1.6.2
  • CVPI paintjob/livery template fixed
  • Rear brake light sizing adjusted properly
  • Passenger door key lock added
  • Door mirrors color adjusted to match black plastic pieces on the car
  • Interior door trim door handles changed to standard interior grey
  • Door trim changed to proper 2011 CVPI trim
  • Climate control texture adjusted
  • Driver's door re-alignment for precision
  • Door hinge adjustment for realistic opening & closing
  • Dials glitch fixed by removing script_rt_dials_cvpi.dds and script_rt_dials_gen_taxi.dds from police.ytd
  • Gaps in interior fixed
  • Interior trim placement fixed
  • Trunk release button area retextured
  • Trunk release button modified
  • Inner fender split from chassis and attached to wing_lf and wing_rf
  • Seat texture error fixed
  • Headrest glitch removed
  • Reverse light External_ID reset
  • Fixed CV_Detail texture
  • Glass crash bug reported and fixed
  • Fixed material issue
  • Fixed alignment of passenger side wheel
  • Fixed inside-out door handle

User Feedback

Recommended Comments

F5544

Members

(edited)

Good work man. One notice. C24 and kevindv improved my first version convert of the dsf cvpi.

Edited by F5544

Murphy

Members Author

27 minutes ago, F5544 said:

Good work man. One notice. C24 and kevindv improved my first version convert of the dsf cvpi.

Good to know, thank you! I was not aware of this. You will be added to the credits section.

Deactivated Member

Deactivated Contributor

21 hours ago, PantherP71 said:

In your future update you should make the trim in the back the same color are the back panel, (darker black or skin color all together) and the mirrors the lighter black plastic trim color of the door handles and moldings. If you need anymore info I can help, like tiny things interior exterior etc. (proud owner of 2009 cvpi) other than that looks good! Can't wait to try it out!!!

What exactly do you mean?

Murphy

Members Author

21 hours ago, PantherP71 said:

In your future update you should make the trim in the back the same color are the back panel, (darker black or skin color all together) and the mirrors the lighter black plastic trim color of the door handles and moldings. If you need anymore info I can help, like tiny things interior exterior etc. (proud owner of 2009 cvpi) other than that looks good! Can't wait to try it out!!!

Thank you for your comment, PantherP71. I am also not sure what you mean about this. Could you please elaborate with photos? Thanks.

Murphy

Members Author

22 hours ago, PantherP71 said:


Disregard my previous response to your comment. All of your requests have been fulfilled in version 1.5, after discussing it with other members and referencing photos from this site. Thank you for your help in improving this resource.

F5544

Members

8 hours ago, Murphy said:

Good to know, thank you! I was not aware of this. You will be added to the credits section.

No problem it is not a big deal. Good work to improve it further. The better the model gets:)

Cj24

Members

There're a few more things in your credits that could be more precise: Most parts of the HQ dashboard are from D:SF, the seats and other interior parts look a lot like Schaefft's, the grill was modeled by KevinDV and most of the headlight modifications were part of my rework of the original version, which included many other changes as well.

Murphy

Members Author

(edited)

3 hours ago, Cj24 said:

There're a few more things in your credits that could be more precise: Most parts of the HQ dashboard are from D:SF, the seats and other interior parts look a lot like Schaefft's, the grill was modeled by KevinDV and most of the headlight modifications were part of my rework of the original version, which included many other changes as well.

Thank you, Cj24. The more accurate I can make the credits, the better. I made them based off of what I found from other published models that I used for resources. I will update the description here, then I will update the ReadMe file in the download when the next version is released.

EDIT: The changes have been made to the description and credits. A lot of details get lost between the conversions of work from different individuals, so I thank you again for bringing this to our attention. I hope that you find you and others are properly credited for your work and effort. Thank you for making this possible.

Edited by Murphy

OfficerFive0

Members

mind my ignorance, but whats the difference between this and offficerunderwoods cvpi?

Murphy

Members Author

(edited)

12 minutes ago, OfficerFive0 said:

mind my ignorance, but whats the difference between this and offficerunderwoods cvpi?

That is okay. There are many differences between his release and this one. The screenshots and Features & Fixes section of the description describe these differences.

To list a few:

  • The frame has been entirely overhauled - The interior was retextured for accuracy, door cards were remodeled, gaps in rear seats, rear window, headliner, etc fixed
  • Exterior trim placement fixed and adjusted
  • Driver's door re-aligned properly with the car
  • Front fenders fixed so they have the inner metal, which was originally stuck to the frame model
  • Tail lights changed with custom ones
  • Front seats removed and replaced with remodeled ones that I worked on with Original Light
  • Detail levels L3, L4 added to car
  • I remade all of the collisions and their placement was adjusted for more proper crashes
  • Various material fixes and adjustments on the body of the car
  • Texture replacement, changes, and overhaul for accuracy and components added to the car
  • Glass crash feature adjusted

The list goes on for quite a while, as I've been working on this for a long time. Anything not listed here appears in the description, photos, and change log. I hope that you use this resource for your work in the future. Thank you.

Edited by Murphy

OfficerFive0

Members

1 minute ago, Murphy said:

That is okay. There are many differences between his release and this one. The screenshots and Features & Fixes section of the description describe these differences.

To list a few:

  • The frame has been entirely overhauled - The interior was retextured for accuracy, door cards were remodeled, gaps in rear seats, rear window, headliner, etc fixed
  • Exterior trim placement fixed and adjusted
  • Driver's door re-aligned properly with the car
  • Front fenders fixed so they have the inner metal, which was originally stuck to the frame model
  • Tail lights changed with custom ones
  • Front seats removed and replaced with remodeled ones that I worked on with Original Light
  • Detail levels L3, L4 added to car
  • All collisions remade and placement was adjusted for more proper crashes
  • Various material fixes and adjustments on the body of the car

The list goes on for quite a while, as I've been working on this for a long time. Anything not listed here appears in the description, photos, and change log. I hope that you use this resource for your work in the future. Thank you.

ok cool ! :thumbsup:

 the rear trim is white on l0d 3 what did i do wrong?

Spoiler

0d8132d5cefcb54ef9bcc5c35f503da9.png


Murphy

Members Author

Just now, OfficerFive0 said:

ok cool ! :thumbsup:

 the rear trim is white on l0d 3 what did i do wrong?

  Hide contents

0d8132d5cefcb54ef9bcc5c35f503da9.png


Sure thing. Happy to help. :)

I'm not sure why it's white on LOD 3. Did you put the GTA V vehshare.ytd textures in the same directory as the model files you imported? 

Another reason why this happened may have to do with Zmodeler 3 itself. With some of my previous works for GTA V, parts turn white on the L2, L3, etc detail levels. I believe it's a software issue, but it appears properly in game despite how it looks in Zmodeler.

OfficerFive0

Members

25 minutes ago, Murphy said:

Sure thing. Happy to help. :)

I'm not sure why it's white on LOD 3. Did you put the GTA V vehshare.ytd textures in the same directory as the model files you imported? 

Another reason why this happened may have to do with Zmodeler 3 itself. With some of my previous works for GTA V, parts turn white on the L2, L3, etc detail levels. I believe it's a software issue, but it appears properly in game despite how it looks in Zmodeler.

i have the vehshare in a separate folder, but its one of zmodeler preloaded packs so its fine.

as far as the trim ill check the material of it to see for sure 

Murphy

Members Author

11 minutes ago, OfficerFive0 said:

i have the vehshare in a separate folder, but its one of zmodeler preloaded packs so its fine.

as far as the trim ill check the material of it to see for sure 

Okay, very good. I wouldn't be too worried about it looking white, though. Here's one thing with the model:

The material used for the rear trim is the same on all LOD models. So, if it appears black on L0, L1, etc, then it will be fine.

OfficerFive0

Members

17 minutes ago, Murphy said:

Okay, very good. I wouldn't be too worried about it looking white, though. Here's one thing with the model:

The material used for the rear trim is the same on all LOD models. So, if it appears black on L0, L1, etc, then it will be fine.

ok good. 

another thing, im missing the police_badges and grill texture. is that a default gta5 texture?

Murphy

Members Author

16 hours ago, OfficerFive0 said:

ok good. 

another thing, im missing the police_badges and grill texture. is that a default gta5 texture?

If I recall correctly, police_badges.dds and grill.dds are default GTA V textures, yes. I forget if they are located in the .ytd files for the original police model, or if they're in the vehshare directory. It is one or the other.

OfficerFive0

Members

1 hour ago, Murphy said:

If I recall correctly, police_badges.dds and grill.dds are default GTA V textures, yes. I forget if they are located in the .ytd files for the original police model, or if they're in the vehshare directory. It is one or the other.

so i found police badges and sheriff lights in police.ytd but couldn't find grill. but i was included in f544s cvpi so i used that. also its missing the emerglights texture. 

and after loading up the car again, (from a z3d) the white trim is now black :)

Murphy

Members Author

3 hours ago, OfficerFive0 said:

so i found police badges and sheriff lights in police.ytd but couldn't find grill. but i was included in f544s cvpi so i used that. also its missing the emerglights texture. 

and after loading up the car again, (from a z3d) the white trim is now black :)

Excellent. I tried importing the model again myself, and the trim was black. I guess Zmodeler is just picky sometimes.

If I recall correctly, police_badges, grill, and emerglights are used in the L3, L4 models, which are far away from the player; so this won't really affect how you see the car in game. I'll have to check my archive that has the versions from 1.0, to see if they went missing in the .ytd. It seems that way, so I'll re-add these textures in the next update. Thanks for helping to look into this.

Gump

Members

f1d68492349b44ac5998e973f96655b6.png

I'm sure you have noticed this, but thought I would bring it to your attention.The third brake light needs to be stretched out a little on the X axis. Thanks for the Vic! Making a model with it now!

Deactivated Member

Deactivated

I'm having a weird issue. None of my lights want to show through your windows. I've put them up in the hierarchy, and also above the whole material hierarchy. I'm not sure if this is your model, or something I'm doing wrong. 

steinberg4145

Members

@Murphy   Hey I think I found an issue or two with your Vic.  So I found there's an issue with the UV mapping on the passenger side of the car seen here:

Spoiler

20160531215113_1.jpg20160531215120_1.jpg


The other issue (idk if I'm doing something wrong or it's the model) is that after "X" amount of editing in Zmodeler3 and importing/exporting I've found that the vehicle collisions get messed up (shown in the video below), and to fix them I have to remove all my added parts from the car, delete the car, re-import the base car, and then add all my stuff back on the car.

https://drive.google.com/open?id=0B6ZJriHhV83ARW8wUXVDZ3IxcHc

TWISTEDSCOPES

Members

1 minute ago, steinberg4145 said:

@Murphy   Hey I think I found an issue or two with your Vic.  So I found there's an issue with the UV mapping on the passenger side of the car seen here:

  Reveal hidden contents

20160531215113_1.jpg20160531215120_1.jpg


The other issue (idk if I'm doing something wrong or it's the model) is that after "X" amount of editing in Zmodeler3 and importing/exporting I've found that the vehicle collisions get messed up (shown in the video below), and to fix them I have to remove all my added parts from the car, delete the car, re-import the base car, and then add all my stuff back on the car.

https://drive.google.com/open?id=0B6ZJriHhV83ARW8wUXVDZ3IxcHc

it's not doing that to me

Murphy

Members Author

2 minutes ago, steinberg4145 said:

@Murphy   Hey I think I found an issue or two with your Vic.  So I found there's an issue with the UV mapping on the passenger side of the car seen here:

  Reveal hidden contents

20160531215113_1.jpg20160531215120_1.jpg


The other issue (idk if I'm doing something wrong or it's the model) is that after "X" amount of editing in Zmodeler3 and importing/exporting I've found that the vehicle collisions get messed up (shown in the video below), and to fix them I have to remove all my added parts from the car, delete the car, re-import the base car, and then add all my stuff back on the car.

https://drive.google.com/open?id=0B6ZJriHhV83ARW8wUXVDZ3IxcHc

Thank you for sharing this. I have no idea why the collisions aren't working for you, as it probably has something to do with the modifications you've made in Zmodeler 3.

However, I do know why there is a problem with the trim - I must have accidentally overlooked the UV mapping for the passenger side.

I will have this fixed within this week.

On 5/29/2016 at 10:40 AM, MattJeter said:

I'm having a weird issue. None of my lights want to show through your windows. I've put them up in the hierarchy, and also above the whole material hierarchy. I'm not sure if this is your model, or something I'm doing wrong. 

This is indeed my model, but it is based off of other conversions. See the credits for further details.

To answer your question, I believe this has to do with the material hierarchy when you imported it. Make sure the materials used for your lights are above the materials for the glass components in the Materials viewer. Hope this helps.

I will be releasing an update that includes a few fixes sometime later this week. 

On 5/28/2016 at 9:14 AM, Gump said:

f1d68492349b44ac5998e973f96655b6.png

I'm sure you have noticed this, but thought I would bring it to your attention.The third brake light needs to be stretched out a little on the X axis. Thanks for the Vic! Making a model with it now!

Thank you for pointing this out. I didn't notice that yet, but that will also be fixed along with the UV mapping error on the passenger doors.

steinberg4145

Members

4 minutes ago, Murphy said:

Thank you for sharing this. I have no idea why the collisions aren't working for you, as it probably has something to do with the modifications you've made in Zmodeler 3.

However, I do know why there is a problem with the trim - I must have accidentally overlooked the UV mapping for the passenger side.

I will have this fixed within this week.

Ok, I didn't quite know if it was something I was doing or not.

 Awesome I'm glad I could help you find that bug.


Create an account or sign in to comment

Account

Navigation

Search

Search

Configure browser push notifications

Chrome (Android)
  1. Tap the lock icon next to the address bar.
  2. Tap Permissions → Notifications.
  3. Adjust your preference.
Chrome (Desktop)
  1. Click the padlock icon in the address bar.
  2. Select Site settings.
  3. Find Notifications and adjust your preference.