


Sebo
Members
-
Joined
-
Last visited
Reputation Activity
-
 Sebo got a reaction from Sergio Toff for a file, BodyCamWhat does this plugin do? This plugin adds a realistic body cam overlay and also plays the sound every 90 seconds (by default, can be configured).
You can change:
The time between the beeps The serial number in the overlay The model text in the overlay The logo and sound A manual toggle key to activate/deactivate the overlay The general overlay scale The date If it works in every view or first person only
A legit copy of Grand Theft Auto V RAGE Plugin Hook
Installation:
1. Copy the files from the .zip into your Grand Theft Auto V\Plugins\ folder.
2. Check the .ini file in Grand Theft Auto V\Plugins\BodyCam\ and adjust the settings and keybinds to your liking.
3. Load the plugin via the RAGE Plugin Hook settings or ingame via the console and enjoy 🙂
How to use the custom logo/sound:
Logo: Place a .png with the logo of your choice (and preferably transparent background) in the Grand Theft Auto V\Plugins\BodyCam\ folder and name the file "custom.png".
Sound: Place a .wav file with the sound of your choice in the Grand Theft Auto V\Plugins\BodyCam\ folder and name the file "custom.wav".
Don't go too crazy with the logo/sound files and keep them as small as possible in terms of file size. Larger sizes might cause issues/crashes.
If you want to stay up to date on the development of my plugins, you can check out my Discord server at the link below.
https://discord.gg/MSW6RPp
If you need help with GTA or LSPDFR you can stop by at our LSPDFR Fans Discord server.
https://discord.gg/HGFwdyB
Disclaimer: We are in no way affiliated with Axon.
-
Sebo got a reaction from Makiyah McMillan for a file, BodyCamWhat does this plugin do? This plugin adds a realistic body cam overlay and also plays the sound every 90 seconds (by default, can be configured).
You can change:
The time between the beeps The serial number in the overlay The model text in the overlay The logo and sound A manual toggle key to activate/deactivate the overlay The general overlay scale The date If it works in every view or first person only
A legit copy of Grand Theft Auto V RAGE Plugin Hook
Installation:
1. Copy the files from the .zip into your Grand Theft Auto V\Plugins\ folder.
2. Check the .ini file in Grand Theft Auto V\Plugins\BodyCam\ and adjust the settings and keybinds to your liking.
3. Load the plugin via the RAGE Plugin Hook settings or ingame via the console and enjoy 🙂
How to use the custom logo/sound:
Logo: Place a .png with the logo of your choice (and preferably transparent background) in the Grand Theft Auto V\Plugins\BodyCam\ folder and name the file "custom.png".
Sound: Place a .wav file with the sound of your choice in the Grand Theft Auto V\Plugins\BodyCam\ folder and name the file "custom.wav".
Don't go too crazy with the logo/sound files and keep them as small as possible in terms of file size. Larger sizes might cause issues/crashes.
If you want to stay up to date on the development of my plugins, you can check out my Discord server at the link below.
https://discord.gg/MSW6RPp
If you need help with GTA or LSPDFR you can stop by at our LSPDFR Fans Discord server.
https://discord.gg/HGFwdyB
Disclaimer: We are in no way affiliated with Axon.
-
Sebo got a reaction from Officer Aaron Thorsen for a file, BodyCamWhat does this plugin do? This plugin adds a realistic body cam overlay and also plays the sound every 90 seconds (by default, can be configured).
You can change:
The time between the beeps The serial number in the overlay The model text in the overlay The logo and sound A manual toggle key to activate/deactivate the overlay The general overlay scale The date If it works in every view or first person only
A legit copy of Grand Theft Auto V RAGE Plugin Hook
Installation:
1. Copy the files from the .zip into your Grand Theft Auto V\Plugins\ folder.
2. Check the .ini file in Grand Theft Auto V\Plugins\BodyCam\ and adjust the settings and keybinds to your liking.
3. Load the plugin via the RAGE Plugin Hook settings or ingame via the console and enjoy 🙂
How to use the custom logo/sound:
Logo: Place a .png with the logo of your choice (and preferably transparent background) in the Grand Theft Auto V\Plugins\BodyCam\ folder and name the file "custom.png".
Sound: Place a .wav file with the sound of your choice in the Grand Theft Auto V\Plugins\BodyCam\ folder and name the file "custom.wav".
Don't go too crazy with the logo/sound files and keep them as small as possible in terms of file size. Larger sizes might cause issues/crashes.
If you want to stay up to date on the development of my plugins, you can check out my Discord server at the link below.
https://discord.gg/MSW6RPp
If you need help with GTA or LSPDFR you can stop by at our LSPDFR Fans Discord server.
https://discord.gg/HGFwdyB
Disclaimer: We are in no way affiliated with Axon.
-
Sebo reacted to BlueGhost for a file, EasyParkingLightsEasyParkingLights (EPL) is a simple and lightweight plugin made to allow users to toggle their amber parking lights on an EPL-compatible vehicle.
The idea for this plugin comes from seeing many law enforcement officers using their parking lights in the evening while their vehicles are parked.
I reached out to Rich to help me with the initial idea, which was to use the vehicle indicators as steady burning lights, but they're hard programmed to flash by the game.
Using that knowledge as a foundation, I reached out to Sebo for further assistance. We came up with a script using similar functions to his HoldMyGun plugin.
Thus, EPL was born.
EPL WILL ONLY WORK ON COMPATIBLE VEHICLES.
What vehicles are compatible with EPL?
As it stands, my vehicles are the only vehicles that can be used with EPL, but I'm sure that other creators will jump aboard and use this feature.
GET MY EPL PACK HERE:
How can I use it?
Simple. Spawn your EPL-compatible vehicle, and hit your modifier+keybind to toggle the parking lights (RShiftKey+N by default).
You may only toggle your parking lights while your vehicle is STOPPED/PARKED, because duh.
Beyond that, depending on which version you've installed, the parking lights will toggle off automatically when you start driving, or they will toggle off manually with the modifier+keybind while your vehicle is in motion.
FOR VEHICLE MODELERS:
-
Sebo reacted to OJdoesIt for a file, Heli Assistance - Observer Mode, Customizable Searchlight, More FeaturesThis mod simulates the flight patterns of Southern California (more specifically, Los Angeles area) law enforcement air support helicopters. That is, they will orbit around a target entity or position instead of just hovering above. A spotlight will track the subject when night-time. You may also call for a backup heli anytime while on-duty.
A Must-Have For Realistic Gameplay!
Make sure to put HeliAssistance.dll and HeliAssistance.ini and HeliAssistance.pdb into \Plugins\LSPDFR folder.
Make sure you have the latest RageNativeUI installed. And make sure you have Spotlight installed.
API for Developers (for usage with v2.4.2)
Take a look at the INI at least once to make sure you are satisfied with the settings.
Special Thanks:
@alexguirre
@DiamondTKG
@NorthKing
@Echooo
LSPDFR Developer Discord
-
Sebo reacted to OJdoesIt for a file, ALPR Traffic Cameras - No More FPS Loss, CustomizationThis mod creates ALPR-enabled traffic cameras around the city of Los Santos. If the traffic camera has a hit, it will notify you just as ALPR+ does. The notification will indicate the cross streets, the direction the vehicle is traveling, the flags, the vehicle model, color, and plates. You will only get hits from nearby traffic cameras. View the INI to edit the range.
Make sure to put ALPR_TrafficCameras.dll and ALPR_TrafficCameras.ini and ALPR_TrafficCameras.pdb into \Plugins\LSPDFR folder.
Make sure to have the latest version of RageNativeUI installed.
Take a look at the INI at least once to make sure you are satisfied with the settings.
Special Thanks:
@DiamondTKG
@NorthKing
LSPDFR Developer Discord
-
Sebo reacted to OJdoesIt for a file, Ambient Emergency Response - CustomizationThis mod creates random emergency vehicle responses that will come pass the player. The player should shut down any major intersection to let the emergency vehicles pass by.
Courtesy of @lttrbmb
Make sure to put AmbientEmergencyResponse.dll and AmbientEmergencyResponse.ini into \Plugins\LSPDFR folder.
Take a look at the INI at least once to make sure you are satisfied with the settings.
You can enter cheat-code "ambientresponse" to force an ambient response.
Special Thanks:
@Dippa
@Jacobb324
@Quasar
@Sebo
@RealTryphonX
@MintTablett
-
Sebo reacted to OJdoesIt for a file, Lojack System - "Recover the stolen vehicle"This mod simulates the workings of the Lojack system. When a lojack-equipped vehicle is stolen, the owner will activate the lojack transmitter on the vehicle remotely. Police cars that are equipped with a Lojack tracker will be able to locate the stolen vehicle via beeping sounds. The closer the police car is near the vehicle, the quicker the beeps get. So again, this mod will fully simulate that experience.
Video Courtesy of @edwardl
This mod is not a callout, but a simple plugin that will search for Lojack-enabled vehicles as an ambient event.
Make sure to put LojackPlugin.dll and LojackPlugin.ini and LojackPlugin.pdb into \Plugins\LSPDFR folder.
Make sure to have the latest version of RageNativeUI installed.
Take a look at the INI at least once to make sure you are satisfied with the settings.
Note: To mark as recovered, you must be on foot and within 5 meters of the vehicle.
Mod suggested by @TWISTEDSCOPES
-
Sebo reacted to kilroy95 for a file, [ELS] Rockford Hills PD 2011 CVPIHere is another release of a old project that I figured I would share. It started off as a personal project. It is based off of North Charleston Police Department's 2011 CVPI's. The only accuracy issue would be the console as I couldn't find any pictures to make that accurate. It's lore for Rockford Hills as I thought it would fit well and there isn't a lot of content for that area in GTA. I really hope you all enjoy! Please report any bugs or issues and I will fix them as soon as I can.
Included:
2011 CVPI
Credits
ReadMe
Screenshots
Red & Blue light textures
-
Sebo reacted to BlueGhost for a file, [ELS] Unmarked 2018 Jeep Grand Cherokee TrackHawk (OUTDATED)GET THE UNMARKED PACK HERE:
You know we are deep into the age of the SUV when the folks at Jeep decide to stuff a Hellcat motor into the Grand Cherokee SRT model. I don’t have to tell you it’s a beast; undoubtedly I had you at “Hellcat motor.” This is a 707 horsepower, two-and-a-half-ton all-wheel-drive SUV. Even if it looks relatively tame, one punch of the gas pedal will tell you that this TrackHawk is much more than “family friendly”. Boasting a 707hp 6.2L HEMI V8, capped with a 2.4L IHI Supercharger, this monstrosity will launch you from 0-60 in three and a half seconds. Don't forget to breathe.
Albeit the real world handling is not reflected in this model, I highly recommend upgrading all of your performance parts to get the most out of the TrackHawk. Change the engine audio to the WINDSOR for maximum immersion.
The Whelen Cencom siren controller has been resized, contrary to the screenshots
BEFORE YOU INSTALL THIS VEHICLE, MAKE SURE YOU'RE USING A MODS FOLDER.
YOU MUST USE A TRAINER TO CHANGE THE WINDOW TINT UPON SPAWNING THE JEEP.
Installation:
Run OpenIV
Enable Edit Mode
Navigate to the latest PatchDay folder in your DLCPacks folder, then drag and drop the vehicle files inside the archive
\mods\update\x64\dlcpacks\patchday##ng\dlc.rpf\x64\levels\gta5\vehicles.rpf\
Navigate to the pack_default folder in your root GTA directory, then drag and drop your preferred VCF (Single or Three Stage) inside the folder
Grand Theft Auto V\ELS\pack_default
Disclaimers:
Hands are NOT aligned with the steering wheel
No functional dials
FAQ:
No, you may NOT use this on your server.
No, this vehicle will never be Non-ELS
-
Sebo reacted to alexguirre for a file, SpotlightInstallation
Install RAGEPluginHook 1.74+. Drop the "Spotlight.dll" file and "Spotlight Resources" folder into the "Plugins" folder in your game directory.
Controls
This plugin has 3 input layouts:
Keyboard:
For toggling the spotlight press I.
For moving it use the NumPad (NumPad4, NumPad6, NumPad8 and NumPad2).
For tracking peds or vehicles press NumPad3. Controller:
For toggling the spotlight press LB + X.
For moving it use the left stick. You can change this to the right stick or the DPad in the General.ini file. Mouse:
For toggling the spotlight press I.
For moving it hold down the left control key and move your mouse.
And to open the in-game editor press F11.
Check General.ini file to change which keys/buttons should be used, or if any controls should be disabled.
Source code
-
Sebo reacted to Zolee for a file, Police WhistleDo you want an old timey police officer experience, who has a whistle to control traffic and stop bad guys with? Then look no further, cause this is the plugin for you!
Installation
Drag the "Plugins" folder into your main Grand Theft Auto V folder
Requirements
RagePluginHook LSPDFR
Usage
Pressing X will use the "traffic controlling" whistle, which will create a zone in which no traffic will take place, pressing X again will remove this zone. If you hold Left Shift and press X the "person stopping" whistle will be used, which has a 30% chance to stop any pedestrian, including bad guys! The keys and the chance is modifiable in the ini file located in the folder: Grand Theft Auto V\Plugins\LSPDFR
Contribution
The plugin is open source, so feel free to use it to your own liking, just credit where credit is due. (Link: https://github.com/ZoleeHUN/PoliceWhistle)
If you want to suggest features or report bugs kindly do so in the comments!
Known Bugs
The Animation is broken when starting to whistle and immediately aiming
Planned Features
Add an animation while aiming Add an animation for the "person stopping" whistle -
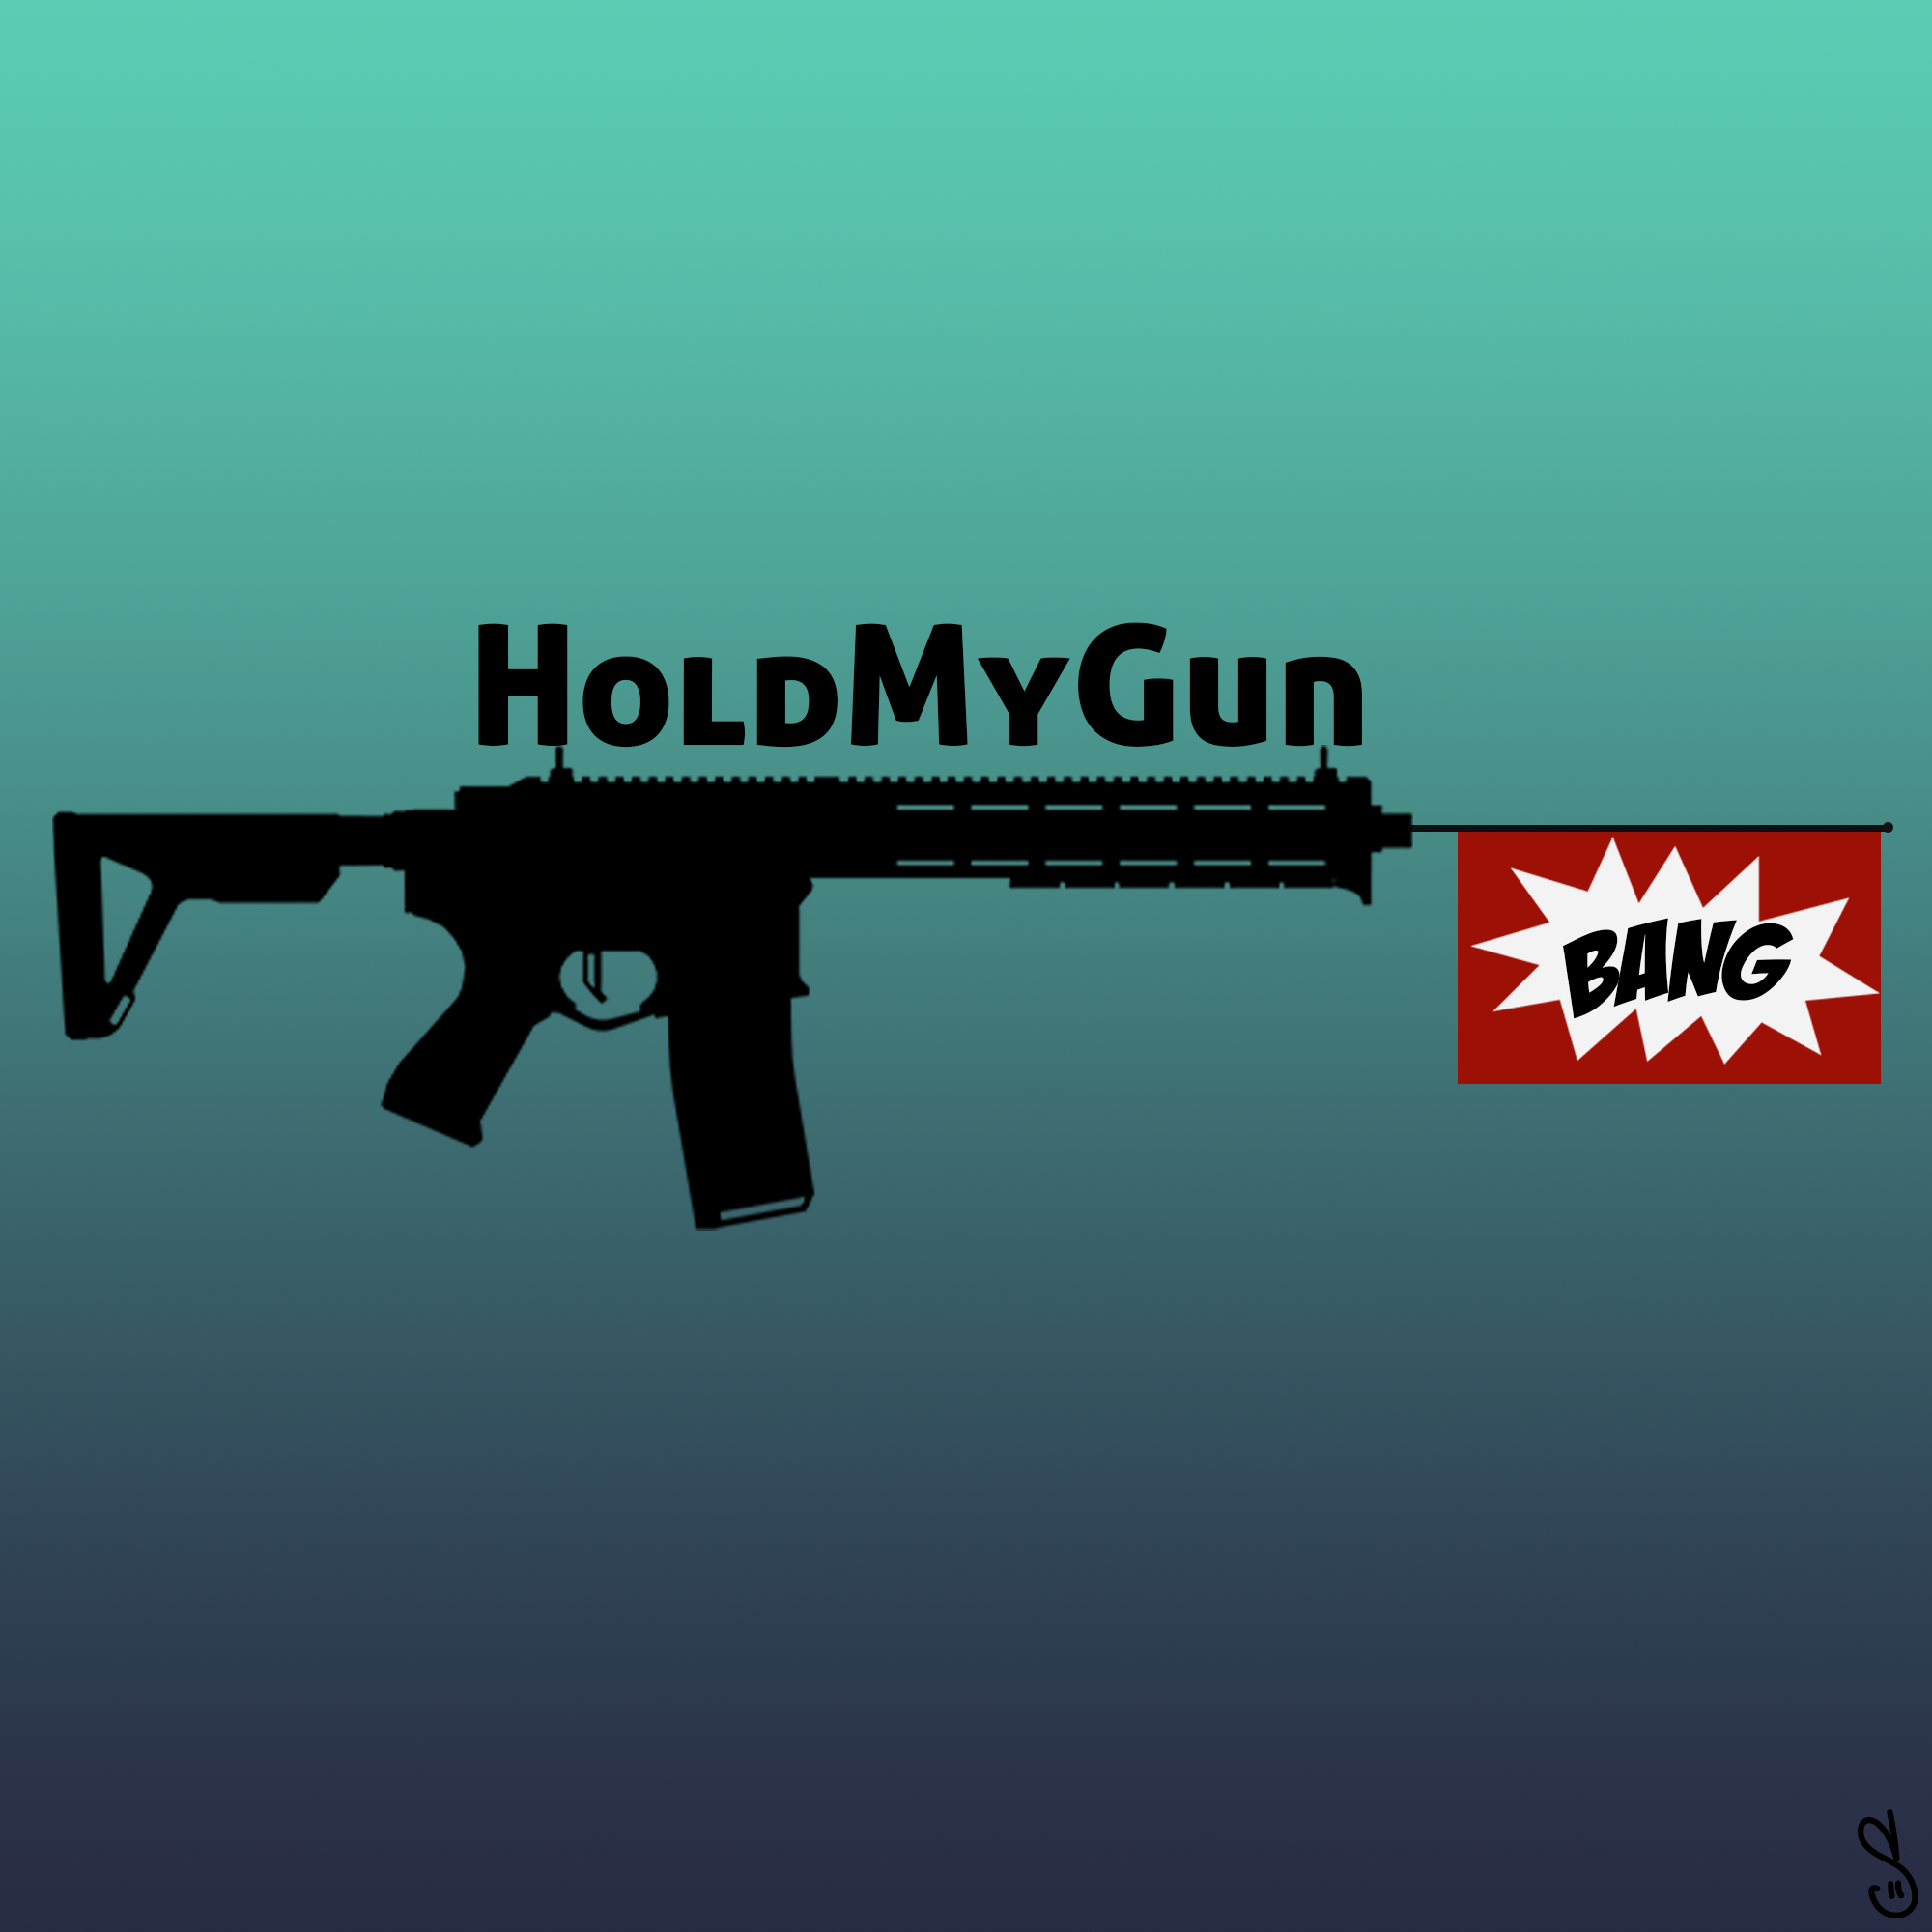
Sebo got a reaction from Paladin Ranger for a file, HoldMyGunFor all vehicle creators/modelers: I've included a documentation file, in case you want to make a compatible vehicle, where people can toggle the weapons in a gunrack. It's not complicated at all, and if you upload a vehicle with this feature, please send me a message so I can put a link up on this download page 🙂
This plugin allows you to store your Carbine Rifle, Shotgun, SMG, as well as Body Armor and Fire Extinguisher in your police car, and also to retrieve it.
It does NOT require compatible vehicles, however, they will add additional features, like seeing your weapons appear/disappear from the gunrack.
Features:
Store your Carbine Rifle, Shotgun, SMG, fire extinguisher and armor in your patrol vehicle. Retrieve the same from either inside the vehicle, or from the outside. Stand near the driver door and press the key to retrieve your weapons, stand near the trunk and press the key to retrieve your armor + medkit and/or your fire extinguisher Includes some fancy animations Customizable attachments for the weapons Customizable keybinds
Installation:
Put the .dll and the .ini into your "Grand Theft Auto V\Plugins\" folder.
Make sure to take a look at the .ini file to set your name and preferred keybind.
You have to sit in a Police car to store and retrieve your rifle/shotgun.
It does not matter whether it's a default police car, a replacement, or an addon, as long as you added the Police car correctly.
It works with the Carbine Rifle(MK2) and PumpShotgun, which come with an equipped flashlight upon retrieving.
Disclaimer:
Do NOT upload or redistribute without my written permission.
This includes private sharing or uploading to any other website.
And here's a link to my Discord server, where you'll find information about the current state of development for my plugins, and you'll get early access to beta builds:
https://discord.gg/RbSGF2d
The first compatible vehicle. Made by @panoszaf. Thank you 🙂
Thanks to FirstThirtyMinutes for showing the plugin in action!
-
Sebo reacted to BlueGhost for a file, [ELS] Kentucky Based Ultra PackDO NOT PM ME WITH QUESTIONS. LEAVE THEM IN THE COMMENTS.
If your game will not load after installing this pack, please install these scripts to allow the game to load up
https://www.gta5-mods.com/tools/packfile-limit-adjuster
https://www.gta5-mods.com/misc/gta-5-gameconfig-300-cars
https://www.gta5-mods.com/tools/heap-limit-adjuster-600-mb-of-heap
Texture loss is to be expected if your PC cannot handle a pack of this magnitude. Run lower graphics settings. Please stop asking me for support about this. Run through each of these suggestions before asking for support.
PHASE ONE (NOVEMBER 2019):
[ELS] San Andreas State Police (Kentucky State Police), 7 vehicles ✅
[ELS] Los Santos Metro Police (Louisville Metro PD), 7 vehicles ✅
[ELS] Blaine County Sheriff’s Office (Jessamine County SO), 3 vehicles ✅
[ELS] Los Santos County Sheriff’s Office (Jefferson County SO), 3 vehicles ✅
[ELS] Paleto Bay Police (Nicholasville PD), 3 vehicles ✅
[ELS] Sandy Shores Police (Wilmore PD), 4 vehicles ✅
[ELS] San Andreas Department of Fish and Wildlife (KY DFW), 3 vehicles ✅
FAQ:
No, you may NOT use this on your FiveM server.
No, I will NOT make a Non-ELS version.
No, I will NOT make a replacement version.
-
Sebo got a reaction from Recoveryboy for a file, BodyCamWhat does this plugin do? This plugin adds a realistic body cam overlay and also plays the sound every 90 seconds (by default, can be configured).
You can change:
The time between the beeps The serial number in the overlay The model text in the overlay The logo and sound A manual toggle key to activate/deactivate the overlay The general overlay scale The date If it works in every view or first person only
A legit copy of Grand Theft Auto V RAGE Plugin Hook
Installation:
1. Copy the files from the .zip into your Grand Theft Auto V\Plugins\ folder.
2. Check the .ini file in Grand Theft Auto V\Plugins\BodyCam\ and adjust the settings and keybinds to your liking.
3. Load the plugin via the RAGE Plugin Hook settings or ingame via the console and enjoy 🙂
How to use the custom logo/sound:
Logo: Place a .png with the logo of your choice (and preferably transparent background) in the Grand Theft Auto V\Plugins\BodyCam\ folder and name the file "custom.png".
Sound: Place a .wav file with the sound of your choice in the Grand Theft Auto V\Plugins\BodyCam\ folder and name the file "custom.wav".
Don't go too crazy with the logo/sound files and keep them as small as possible in terms of file size. Larger sizes might cause issues/crashes.
If you want to stay up to date on the development of my plugins, you can check out my Discord server at the link below.
https://discord.gg/MSW6RPp
If you need help with GTA or LSPDFR you can stop by at our LSPDFR Fans Discord server.
https://discord.gg/HGFwdyB
Disclaimer: We are in no way affiliated with Axon.
-
What does this plugin do? This plugin adds a realistic body cam overlay and also plays the sound every 90 seconds (by default, can be configured).
You can change:
The time between the beeps The serial number in the overlay The model text in the overlay The logo and sound A manual toggle key to activate/deactivate the overlay The general overlay scale The date If it works in every view or first person only
A legit copy of Grand Theft Auto V RAGE Plugin Hook
Installation:
1. Copy the files from the .zip into your Grand Theft Auto V\Plugins\ folder.
2. Check the .ini file in Grand Theft Auto V\Plugins\BodyCam\ and adjust the settings and keybinds to your liking.
3. Load the plugin via the RAGE Plugin Hook settings or ingame via the console and enjoy 🙂
How to use the custom logo/sound:
Logo: Place a .png with the logo of your choice (and preferably transparent background) in the Grand Theft Auto V\Plugins\BodyCam\ folder and name the file "custom.png".
Sound: Place a .wav file with the sound of your choice in the Grand Theft Auto V\Plugins\BodyCam\ folder and name the file "custom.wav".
Don't go too crazy with the logo/sound files and keep them as small as possible in terms of file size. Larger sizes might cause issues/crashes.
If you want to stay up to date on the development of my plugins, you can check out my Discord server at the link below.
https://discord.gg/MSW6RPp
If you need help with GTA or LSPDFR you can stop by at our LSPDFR Fans Discord server.
https://discord.gg/HGFwdyB
Disclaimer: We are in no way affiliated with Axon.
-
Sebo reacted to HP Deskjet for a file, New York State Police - Dodge Charger 4 packI posted this pack a long time ago, and am re-uploading it because it's just been sitting on my HDD doing nothing.
Features:
realistic lighting pattern. (countless hours of video review, real life comparisons, videos, etc... The lighting couldn't be more accurate)
realistic livery (3G14 only) (reflective inside and outside the vehicle)
Fully functional Spotlight (Alt+[ or Alt+] to rotate spotlight --- also turn high beams on for functional spotlight)
Functional takedowns. (takedown key)
ELS + Non-ELS Hybrid.
ELS:
Lightbar front/partial back Rambar TA Mirror lights Interior light controllers Non-ELS (activated on stage 3):
Lightbar back TA (ELS TA turns off) DRL's + Brakelights
This will always be a WIP. Eventually it'll become a bigger pack.
-
 What does this plugin do? This plugin adds a realistic body cam overlay and also plays the sound every 90 seconds (by default, can be configured).
You can change:
The time between the beeps The serial number in the overlay The model text in the overlay The logo and sound A manual toggle key to activate/deactivate the overlay The general overlay scale The date If it works in every view or first person only
A legit copy of Grand Theft Auto V RAGE Plugin Hook
Installation:
1. Copy the files from the .zip into your Grand Theft Auto V\Plugins\ folder.
2. Check the .ini file in Grand Theft Auto V\Plugins\BodyCam\ and adjust the settings and keybinds to your liking.
3. Load the plugin via the RAGE Plugin Hook settings or ingame via the console and enjoy 🙂
How to use the custom logo/sound:
Logo: Place a .png with the logo of your choice (and preferably transparent background) in the Grand Theft Auto V\Plugins\BodyCam\ folder and name the file "custom.png".
Sound: Place a .wav file with the sound of your choice in the Grand Theft Auto V\Plugins\BodyCam\ folder and name the file "custom.wav".
Don't go too crazy with the logo/sound files and keep them as small as possible in terms of file size. Larger sizes might cause issues/crashes.
If you want to stay up to date on the development of my plugins, you can check out my Discord server at the link below.
https://discord.gg/MSW6RPp
If you need help with GTA or LSPDFR you can stop by at our LSPDFR Fans Discord server.
https://discord.gg/HGFwdyB
Disclaimer: We are in no way affiliated with Axon.
-
What does this plugin do? This plugin adds a realistic body cam overlay and also plays the sound every 90 seconds (by default, can be configured).
You can change:
The time between the beeps The serial number in the overlay The model text in the overlay The logo and sound A manual toggle key to activate/deactivate the overlay The general overlay scale The date If it works in every view or first person only
A legit copy of Grand Theft Auto V RAGE Plugin Hook
Installation:
1. Copy the files from the .zip into your Grand Theft Auto V\Plugins\ folder.
2. Check the .ini file in Grand Theft Auto V\Plugins\BodyCam\ and adjust the settings and keybinds to your liking.
3. Load the plugin via the RAGE Plugin Hook settings or ingame via the console and enjoy 🙂
How to use the custom logo/sound:
Logo: Place a .png with the logo of your choice (and preferably transparent background) in the Grand Theft Auto V\Plugins\BodyCam\ folder and name the file "custom.png".
Sound: Place a .wav file with the sound of your choice in the Grand Theft Auto V\Plugins\BodyCam\ folder and name the file "custom.wav".
Don't go too crazy with the logo/sound files and keep them as small as possible in terms of file size. Larger sizes might cause issues/crashes.
If you want to stay up to date on the development of my plugins, you can check out my Discord server at the link below.
https://discord.gg/MSW6RPp
If you need help with GTA or LSPDFR you can stop by at our LSPDFR Fans Discord server.
https://discord.gg/HGFwdyB
Disclaimer: We are in no way affiliated with Axon.
-
Sebo reacted to Gump for a file, 2009 ALEA Dodge Charger Slicktop (ELS)This was just a charger that I did real quick. Been wanting to do one for a while! You may want to play with the light codes for a cool pattern. Couldn't really find something that was cool. But, it's decent.Enjoy!
Note: You can change window tint via trainer!
Base model:
-Original Dodge Charger Model by Unknown. Modified, Textured, Templated and Converted to GTA V by PSource
-Model extensively edited for GTA V by PSource
-2009-2010 Taillights & Reverse Lights from NFS MW 2012 Charger. Fitted and Edited by PSource
-Door Trim, Gear Lever, Interior Mounted Mirror and Steering Wheel from Forza. Converted, Fitted and Textured by PSource
-Driver & Passenger Front Seats from Simraceway. Textured and Converted by PSource
-Wheels by Carper
Lighting:
-Whelen Inner Edge by Five0
-Whelen LINZ 6 by Five0 with mounts by Gump
-Whelen PAR by HDGamerzPC
-Whelen Lower Edge by majorpaine2015 with edits by Gump
-Whelen Dominator by Five0
Equipment:
-Panasonic Arbitrator by JohnClarke
-Decatur Genisis by BxBugs123
-Roughbook by JohnBD
-Radio by Officer Underwood
-Whelen sirenbox by Five0
-Laptop mount by HDgamerzPC
-Liveries by Gump and a BCSO by OfficerAnderson266 that I thought was cool
To install the models:
1)Get OpenIV
2)Navigate to mods/update/x64/dlcpacks/latest patch day number/dlc.rpf/x64/levels/gta5/props/click on vehicles.rpf
3)Make sure edit mode is on at the top right and click the green "plus" up top.
4)Import the police2.yft,police2_hi and police2.ytd
To install ELS .VCF
1)With normal window browser(not openIV) got to local disk C/Program Files/Rockstar Games/Grand Theft Auto V/ELS/pack_default
2)Drag and drop the police2.xml that was provided in the download. The provided .VCF is to ensure correct lighting patterns and extra's.
To install extra options in the folders:
1)With OpenIV navigate to mods/update/x64/dlcpacks/latest patch day number/dlc.rpf/x64/levels/gta5/props/vehicles.rpf and look for police2.ytd
2)Make sure edit mode is on
3)Click import
4)Naviate to where the extra optional textures are and click on them
5)Click save
Stay vigil and thirsty my friends..
-
Sebo reacted to Will for a file, Stow That WeaponStow That Weapon - Version 3.1.1
The Details
Bring immersion to your GTA V / LSPDFR experience with Stow That Weapon, a highly customizable RPH plugin that visually stores your long guns and shotguns on your character when they're not in use. Weapons are attached realistically to your player, complete with attachments, tint, and fully adjustable positioning to suit your preference. With full AI support, the same realistic stowing behavior can be applied to NPCs as well - making patrols and scenes feel even more authentic.
The Features
Automatic Weapon Stowing: Once you switch away from an accepted weapon, it's automatically placed on your character until needed again.
Customizable Weapon Positions: Fine-tune weapon placement with adjustable offsets and rotation to achieve the perfect fit on your character.
Customizable Weapon List: Define exactly which weapons should be stowed via configuration settings.
Live In-Game Settings Menu: Use the built-in menu (default key F5) to tweak most settings on the fly, including positioning offsets and rotation.
Attachment Support: Stowed weapons display their attachments and accessories, with optional support for addon components.
AI Support: Enable weapon stowing for AI peds, with separate customizable settings, including only enabling support for cops or all peds.
Quick Remove Key: A configurable hotkey lets you instantly remove the stowed weapon if needed.
Additional Customization: Don't like the stowed weapon clipping through your vehicle? Choose to hide it while driving. Don't like how the game activates the flashlight on your stowed weapon while using the flashlight on your equipped weapon? Disable the flashlight from showing. Want the AI to show a stowed weapon even if they haven't equipped it? Enable best weapon to show whatever their best accepted weapon is in their inventory.
Installation
Installation is as simple as dragging the contents of the zip file to your GTA V folder.
BackWeapon.dll and BackWeapon.pdb will end up in the plugins folder and RAGENativeUI.dll is in the main directory.
Please note if you already have RAGENativeUI installed, it is recommended to keep whichever is newer.
Load with RPH.
Notes and Resources
GTA V NOTE: Sometimes the GTA V folder gets set as read-only. This may prevent the plugin from writing to the ini file which would likely result in a crash. Please ensure your GTA V folder is not set to read-only before using this plugin.
MENU NOTE: Almost all settings can be changed by the menu except the accepted weapons and addon components lists, which must be manually edited within the BackWeapon.ini file. The ini file can be reloaded via the Reload ini File menu option. The only setting that requires the plugin to be reloaded is EnableAI. Changing this in game will not have an effect until the plugin is reloaded.
INI NOTE: The .ini file is not provided with the download and is instead generated if it does not exist on first load of the plugin. If it does exist, the plugin will check for missing values and add them.
ADDON COMPONENTS NOTE: AddonComponents in the ini file is to be used if you have any addon weapon components (all default weapon components are already accounted for), so that they show up on the stowed weapon. You add them using the name (i.e., COMPONENT_AT_AR_FLSH) and separate multiple values with a comma.
LIST OF DEFAULT WEAPON IDs: https://wiki.rage.mp/index.php?title=Weapons
KEYS REFERENCE: https://docs.microsoft.com/en-us/dotnet/api/system.windows.forms.keys?view=netframework-4.8
DEFAULT INI VALUES AND EXPLANATION:
[Main] HideWhileInVehicle = true "If true, the weapon will be invisible while the player is in a vehicle." DisableFlashlight = false "If true, the weapon will not show the flashlight component on the back of both the player and AI." AcceptedWeapons = weapon_smg, weapon_pumpshotgun, weapon_pumpshotgun_mk2, weapon_carbinerifle, weapon_carbinerifle_mk2, weapon_specialcarbine, weapon_specialcarbine_mk2 "List of weapons that will show on the player's back." OffsetPosition = 0.0,-0.17,-0.02 "Position of the weapon relative to the player's Spine3 bone." Rotation = 0.0,165,0.0 "Rotation of the weapon for the player." [AI] EnableAI = true "If true, enables support for the AI." EnableBestWeapon = true "If true, the best weapon in the ped's inventory will show on their back if they have not yet equipped an accepted weapon." CopsOnly = true "If true, will only show weapons on the back of cops. Otherwise, will work on all peds in the game." HideWhileInVehicle = true "If true, the weapon will be invisible while the ped is in a vehicle." AcceptedWeapons = weapon_smg, weapon_pumpshotgun, weapon_pumpshotgun_mk2, weapon_carbinerifle, weapon_carbinerifle_mk2, weapon_specialcarbine, weapon_specialcarbine_mk2 "List of weapons that will show on the peds' backs." OffsetPosition = 0.0,-0.17,-0.02 "Position of the weapon relative to the ped's Spine3 bone." Rotation = 0.0,165,0.0 "Rotation of the weapon for AI." [Advanced] AddonComponents = None "Here you can add any addon weapon components you have installed so that they will show up on the stowed weapon. You need to use the name of component, ie COMPONENT_AT_AR_FLSH. Multiple entries should be separated by a comma." [Keybindings] DeleteWeaponKey = Decimal "The key for deleting the weapon off the player's back." MenuKey = F5 "The key for opening the menu added with version 3.0.0" GunDown = Down "Keys for moving the weapon when customizing position" GunUp = Up GunLeft = Left GunRight = Right GunRollLeft = NumPad4 GunRollRight = NumPad6 GunForward = NumPad8 GunBackward = NumPad2 GunYawLeft = NumPad7 GunYawRight = NumPad9 GunPitchLeft = NumPad1 GunPitchRight = NumPad3 -
What does this plugin do? This plugin adds a realistic body cam overlay and also plays the sound every 90 seconds (by default, can be configured).
You can change:
The time between the beeps The serial number in the overlay The model text in the overlay The logo and sound A manual toggle key to activate/deactivate the overlay The general overlay scale The date If it works in every view or first person only
A legit copy of Grand Theft Auto V RAGE Plugin Hook
Installation:
1. Copy the files from the .zip into your Grand Theft Auto V\Plugins\ folder.
2. Check the .ini file in Grand Theft Auto V\Plugins\BodyCam\ and adjust the settings and keybinds to your liking.
3. Load the plugin via the RAGE Plugin Hook settings or ingame via the console and enjoy 🙂
How to use the custom logo/sound:
Logo: Place a .png with the logo of your choice (and preferably transparent background) in the Grand Theft Auto V\Plugins\BodyCam\ folder and name the file "custom.png".
Sound: Place a .wav file with the sound of your choice in the Grand Theft Auto V\Plugins\BodyCam\ folder and name the file "custom.wav".
Don't go too crazy with the logo/sound files and keep them as small as possible in terms of file size. Larger sizes might cause issues/crashes.
If you want to stay up to date on the development of my plugins, you can check out my Discord server at the link below.
https://discord.gg/MSW6RPp
If you need help with GTA or LSPDFR you can stop by at our LSPDFR Fans Discord server.
https://discord.gg/HGFwdyB
Disclaimer: We are in no way affiliated with Axon.
-
What does this plugin do? This plugin adds a realistic body cam overlay and also plays the sound every 90 seconds (by default, can be configured).
You can change:
The time between the beeps The serial number in the overlay The model text in the overlay The logo and sound A manual toggle key to activate/deactivate the overlay The general overlay scale The date If it works in every view or first person only
A legit copy of Grand Theft Auto V RAGE Plugin Hook
Installation:
1. Copy the files from the .zip into your Grand Theft Auto V\Plugins\ folder.
2. Check the .ini file in Grand Theft Auto V\Plugins\BodyCam\ and adjust the settings and keybinds to your liking.
3. Load the plugin via the RAGE Plugin Hook settings or ingame via the console and enjoy 🙂
How to use the custom logo/sound:
Logo: Place a .png with the logo of your choice (and preferably transparent background) in the Grand Theft Auto V\Plugins\BodyCam\ folder and name the file "custom.png".
Sound: Place a .wav file with the sound of your choice in the Grand Theft Auto V\Plugins\BodyCam\ folder and name the file "custom.wav".
Don't go too crazy with the logo/sound files and keep them as small as possible in terms of file size. Larger sizes might cause issues/crashes.
If you want to stay up to date on the development of my plugins, you can check out my Discord server at the link below.
https://discord.gg/MSW6RPp
If you need help with GTA or LSPDFR you can stop by at our LSPDFR Fans Discord server.
https://discord.gg/HGFwdyB
Disclaimer: We are in no way affiliated with Axon.


.thumb.JPG.feb4613703213941915cc5c38a5ce32d.JPG)


.thumb.jpg.2889d7a514bd9bfe213a23516ba652ad.jpg)

