


So, you're tired of the skins that came with the car, or you found some really cool ones online. This tutorial is going to teach you how to put those epic skins in action!
Warning: Some Skins may not work on some models due to different templates being used. Please check file before downloading to ensure compatibility.
1.Download Skins
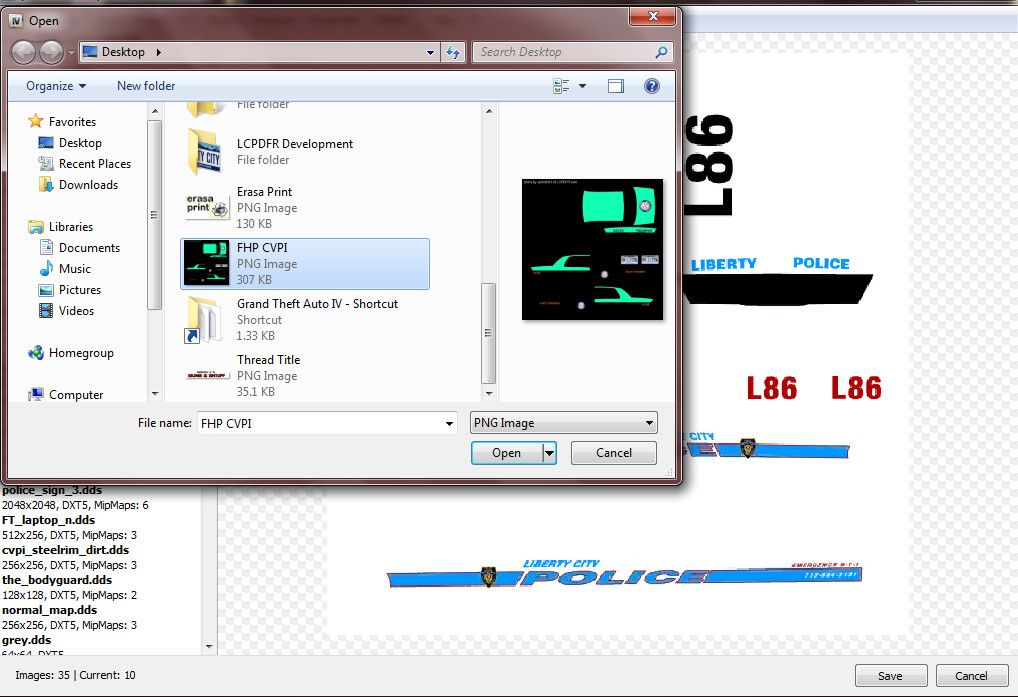
2. Open the file, Find the correct file. It will be a PNG.
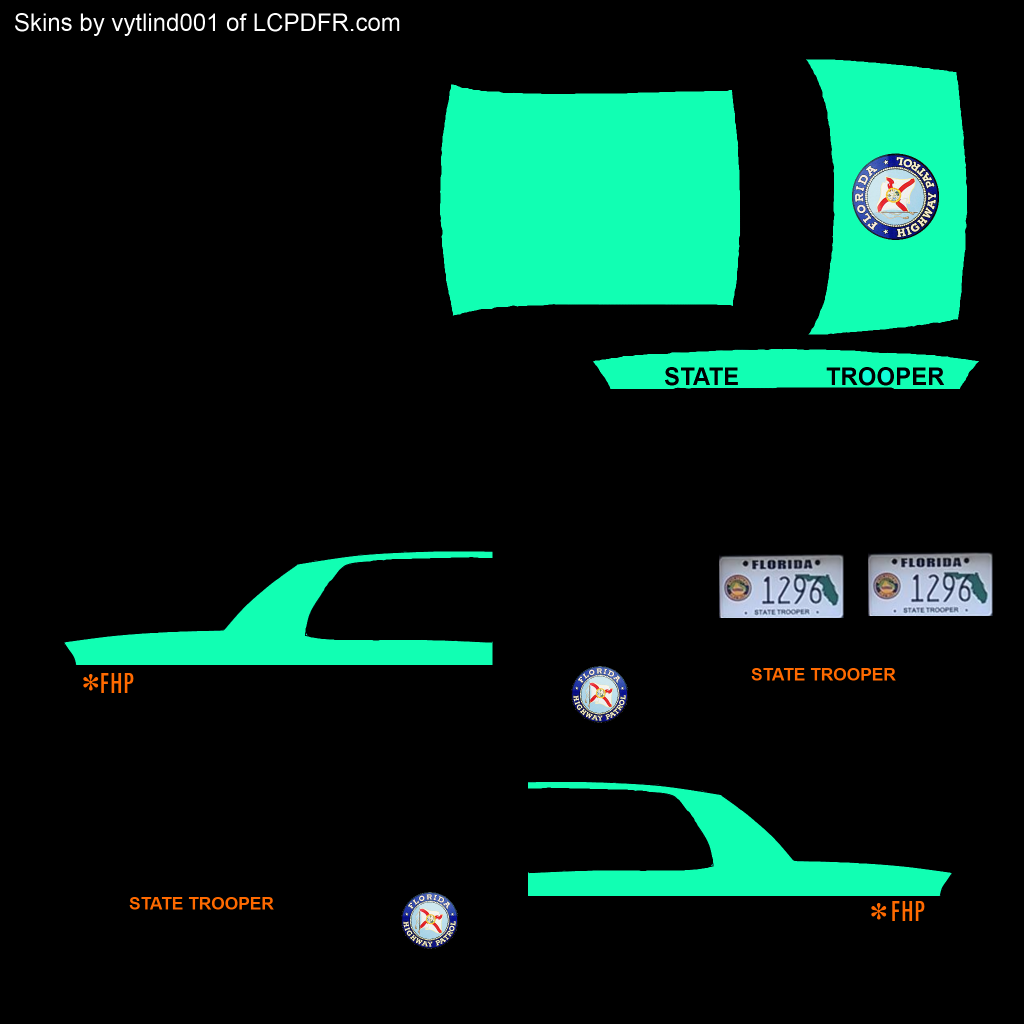
Example:
3. Drag the skin(s) to your desktop
4. Open your preferred program for installing car mods (OpenIV/Spark IV)
5. Import the textures.
a) For Open IV do the following:
i) Click "Models" (Highlighted Here)
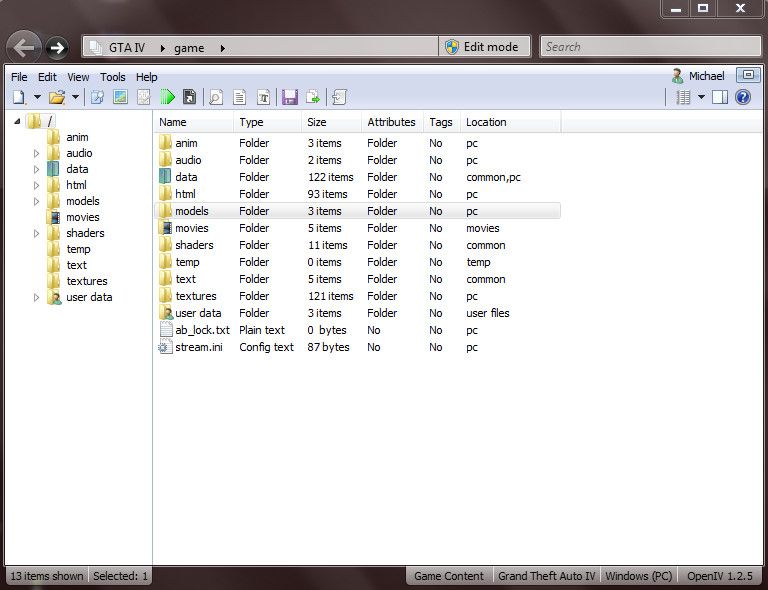
ii) Click "CDImages"

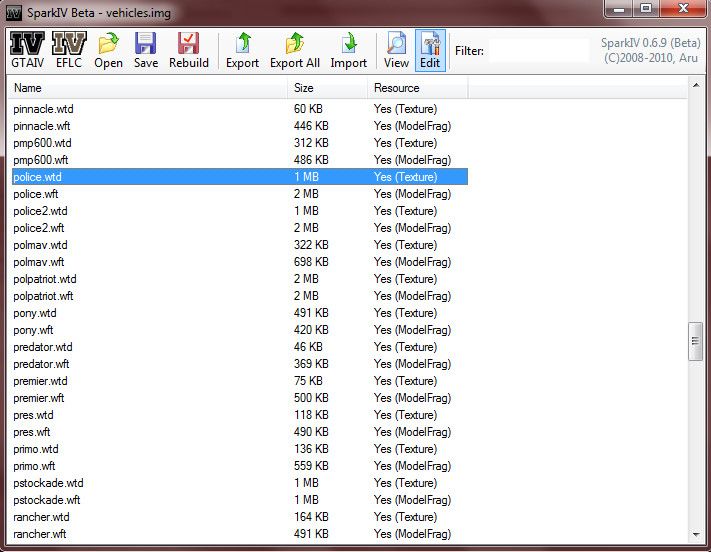
iii) Click "Vehicles.img"
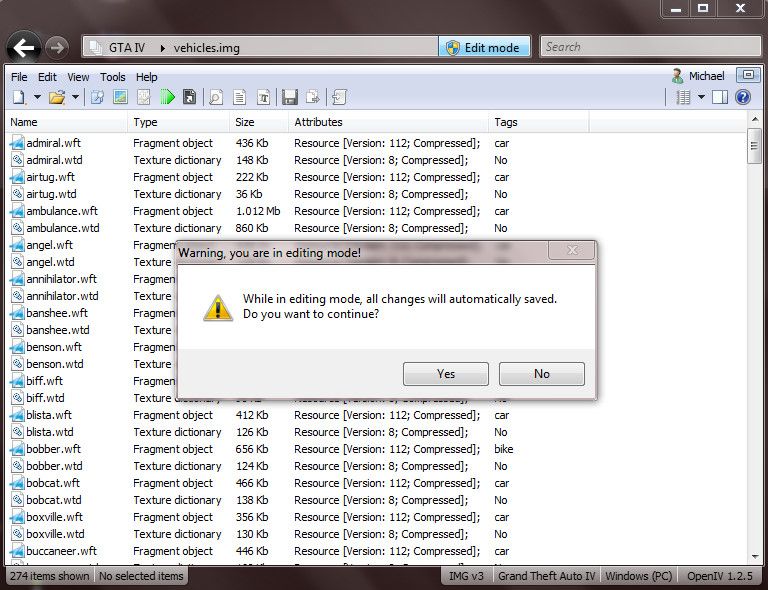
iv) Click Edit Mode (Highlighted here) and follow the prompt
v) Find the vehicle you want to put the skin on. Mine is in the "police" slot
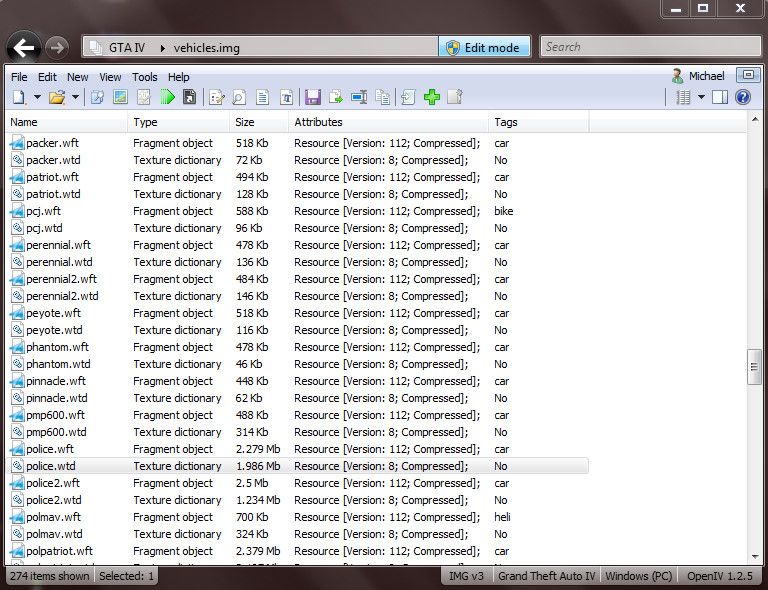
vi) Click on the .wtd file for the vehicle.
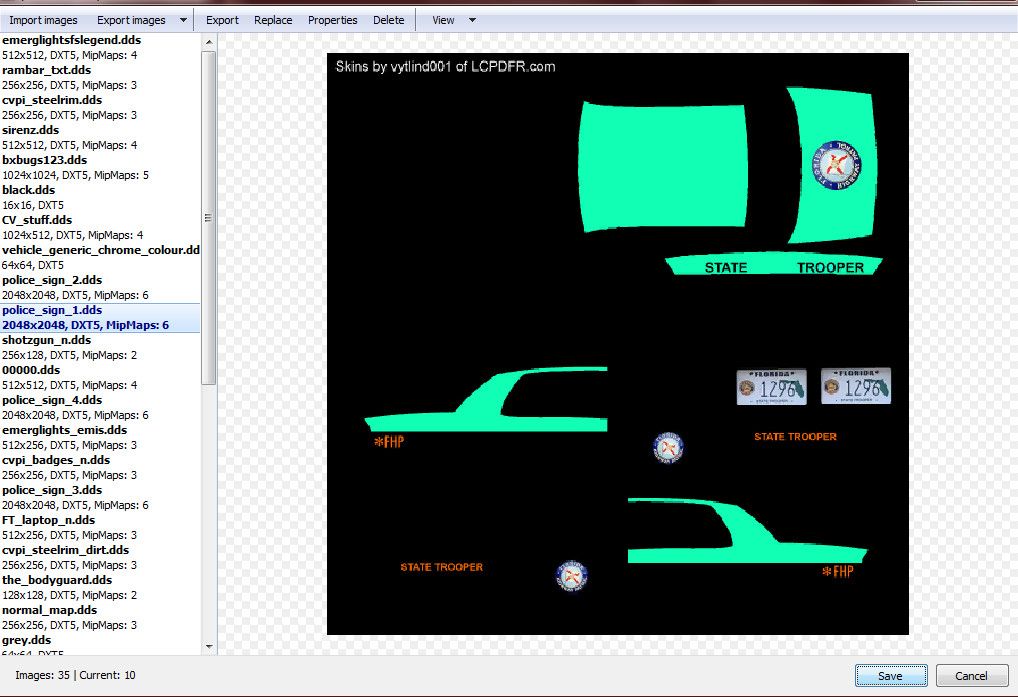
vii) Find the texture called "police_sign_1" or "paintjob_sign_1" or similar.

viii)Click "Replace" at the top
ix) Find and click on your Skin
x) Click "Open"
xi) Repeat for (INSERT NAME HERE)_sign_2, 3 and 4 if desired
xii) Click Save
xiii) Enjoy.
b)
i) Click "Browse", or in the newer versions, click the GTA IV or EFLC button

ii) Scroll down and click "cdimages"

iii) Double Click "vehicles.img"

iv) Find the vehicle you want to put the skin on
v) Click the .wtd file and click "Edit" at the top
vi)Find and click the entry called "police_sign_1", "subu_sign_1", "chgr_sign_1" or similar
vii) Click the Import Texture button at the top, find my texture and click "Open"

viii) Do the same for ..._sign_2, 3 or 4 or as many slots you want to put it in
ix) Save and Close
x) Enjoy
Post any questions you may have below. Thanks for reading. Hope it helps.
Recommended Comments
Join the conversation
You can post now and register later. If you have an account, sign in now to post with your account.