


Anaxes
Members
-
Joined
-
Last visited
Everything posted by Anaxes
-
-
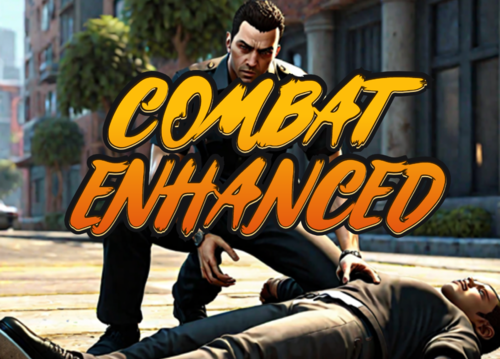 Can't wait to try this out, seems interesting and new take on arresting peds.
- 84 comments
- 9 reviews
-
-

- 3
-
-
 Doesn't seem to work on the latest GTAV update (2944) and for the latest version of RPH.
- 341 comments
- 16 reviews
-
Hello, I am trying to edit the Peds.xml file to change the peds from native GTA peds to mp_m_freemode_01. However, I've encountered a problem where I can't add specific components and props to VariationGroup. These are the components and props that don't seem to be working. <prop chance="100" value="4" prop="WATCHES" /> <comp chance="100" value="88" comp="PANTS" /> <comp chance="100" value="122" comp="BEARD" /> <comp chance="100" value="3" comp="SHIRTOVERLAY" /> As a result of these not working Coastal Callouts is not loading. Please advise how I can fix this, as I love playing with Coastal Callouts! Thanks, Anaxes.
-
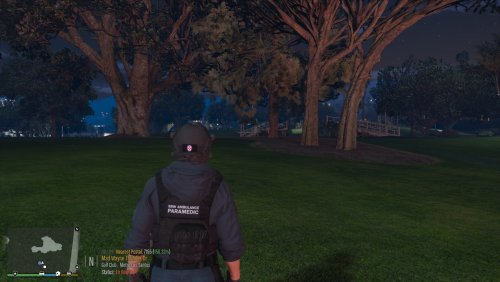 Hey guys! This is my first re-texture of a realistic model. Any feedback please tell me in the comments! This re-texture is mostly based off NSWAS SOT Paramedics currently in service. The re-texture is mostly realistic, however I played off with the paramedics being tactical paramedics hence why they have weapons in the images. Any how, enjoy! Don't forgot to review ⭐! 👀 Keep an eye out: I may release a version for Hanako's G3 soon! Reference Image (NSWAS SOT Paramedic): REQUIRED MODS: HANAKO's EUP Clothes Pack, HANAKO's EUP Vest&Earpiece Pack & EUP Law&Order Vest: Vest Install Path: Grand Theft Auto V\mods\update\x64\dlcpacks\eup\dlc.rpf\x64\eup_componentpeds.rpf\mp_m_freemode_01_mp_m_smuggler_01 Please note: The install path for Vest 11, Setup 2 is meant to be in a different folder (clothes_01), however I did not have it so I have moved it over to smuggler_01. Any folder with task_001_u.ydd should work. Replacement texture is for: task_001_u.ydd Boot up OpenIV and find the specific folder, stated above. Open the "Files" folder in the ZIP file, then open the "Vest" folder, then open the "Vest 11, Setup 2" folder. Drag and drop the texture onto your desktop.\ Now open up task_diff_001_a_uni.ytd. Open the file and replace the texture, by right clicking and pressing "replace" In the file explorer pop-up, navigate to the desktop to find the replacement texture. Helmet: Helmet Install Path: Grand Theft Auto V\mods\update\x64\dlcpacks\eup\dlc.rpf\x64\eup_componentpeds_p.rpf\mp_m_freemode_01_p_mp_m_vinewood Replacement texture is for: p_head_001.ydd Boot up OpenIV and find the specific folder, stated above. Open the "Files" folder in the ZIP file, then open the "Helmet" folder. Drag and drop the texture onto your desktop. Now open up p_head_diff_001_a.ytd. Open the file and replace the texture, by right clicking and pressing "replace" In the file explorer pop-up, navigate to the desktop to find the replacement texture. Pant: Pant Install Path: Grand Theft Auto V\mods\update\x64\dlcpacks\eup\dlc.rpf\x64\eup_componentpeds.rpf\mp_m_freemode_01_male_freemode_mplts Please note: I believe these pants come default with EUP Law&Order. Replacement texture is for: lowr_000_r.ydd Boot up OpenIV and find the specific folder, stated above. Open the "Files" folder in the ZIP file, then open the "Pant" folder. Drag and drop the texture onto your desktop. Now open up lowr_diff_000_a_whi.ytd. Open the file and replace the texture, by right clicking and pressing "replace" In the file explorer pop-up, navigate to the desktop to find the replacement texture. Shirt: Shirt Install Path: Grand Theft Auto V\mods\update\x64\dlcpacks\eup\dlc.rpf\x64\eup_componentpeds.rpf\mp_m_freemode_01_mp_m_gunrunning_01 Replacement texture is for: jbib_015_u.ydd Boot up OpenIV and find the specific folder, stated above. Open the "Files" folder in the ZIP file, then open the "Shirt" folder. Drag and drop the texture onto your desktop. Now open up jbib_diff_015_a_uni.ytd. Open the file and replace the texture, by right clicking and pressing "replace" In the file explorer pop-up, navigate to the desktop to find the replacement texture. ⚠️ Warning: I am not responsible for any damages to your game. Install at your own risk. I have tried my best to instruct you on how to install these. Just a reminder that these textures will only work if you have the REQUIRED MODS installed. Thanks, Anaxes. Clothes Pack: Vest&Earpiece Pack: EUP Law&Order Pack:
 -
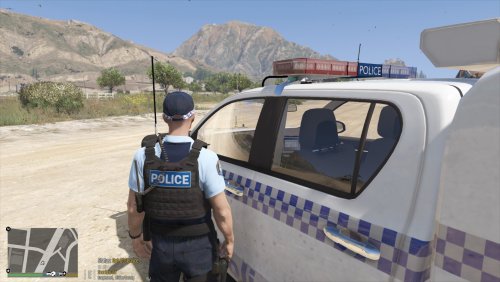 Install path (OpenIV): Grand Theft Auto V\mods\update\x64\dlcpacks\eup\dlc.rpf\x64\eup_componentpeds.rpf\mp_m_freemode_01_mp_m_january2016 ⚠️ Due to the limitations of certain components, I have switched Hanko's EUP VEST&EARPIECE Vest 4, Setup 2 to mp_m_freemode_01_mp_m_january2016 Steps to replace texture (If you already have Hanako's EUP VEST&EARPIECE Vest 4, Setup 2 installed - please make sure to read the warning label): 1. Boot up OpenIV and find the specific folder, stated above. 2. Open the "Files" folder in the ZIP file. 3. Drag and drop all the textures onto your desktop. 4. Now Open up task_diff_000_a_uni.ytd through to task_diff_000_j_uni.ytd. 5. Open each and replace the texture, by right clicking and pressing "replace" 6. In the file explorer pop-up, navigate to the desktop to find the replacement texture. Steps 4-5 are repeated for 10 times for each texture. Please note that you can also follow Hanako's default location: Grand Theft Auto V\mods\update\x64\dlcpacks\eup\dlc.rpf\x64\eup_componentpeds.rpf\mp_m_freemode_01_mp_m_heist3 And in that case find the texture that you like and follow these steps: 1. Open the "Files" folder in the ZIP file. 2. Drag and drop the texture that you want onto your desktop. 3. Now open up task_diff_000_a_uni.ytd. 4. Once opened, replace the texture, by right clicking and pressing "replace". 5. In the file explorer pop-up, navigate to the desktop to find the replacement texture. I have also included an extra folder which contains realistic vest textures used within the New South Wales Police Force and Queensland Police Service. For Vest 7, Setup 2 the install location is: Grand Theft Auto V\mods\update\x64\dlcpacks\eup\dlc.rpf\x64\eup_componentpeds.rpf\mp_m_freemode_01_mp_m_heist3 1. Open task_diff_001_a_uni.ytd 2. Right click the texture and click "replace" 3. Drag and Drop the texture of your liking onto your desktop from the ZIP file 4. Navigate in the pop-up to your desktop to find the replacement texture. You must have EUP Law & Order and Hanako EUP VEST&EARPIECE mods installed for these textures to work correctly. Inspiration for the realistic vests (First is QPS, second is NSWPF): Credits: Model - Hanako Functionality - Alex_Ashfold, et al (EUP Team). Textures - Anaxes Thanks, Anaxes.
 -
 Alright thanks, do you have an image of what you want the front to look like?
 -
I'll see what I can do, which Hanko vest is this?
-
I haven't considered making NSW themed vests or jumpers, due to me not being a 3D modeler/having 0 experience with modelling. However, as seen in the images, I am currently re-texturing one of Hanako's vests for QPS and NSWPF. Which I plan on releasing soon. But, they are very fictional. Here are some sneak peaks of what they look like:
-
Hey guys, I noticed that there weren't many NSW Police Force based K-9 Vests available for martinct's K-9 model. So here is one for you. This is my first ever texture, and I plan on releasing more K-9 vests for you guys, maybe one with some classic NSW checkered blue stripes as well. Any feedback is appreciated 😁 Inspiration: Must have martinct's K-9 model installed: Thanks, Anaxes.
-
-
.thumb.png.c1b5ef4e63b49835eafac2233921a5ff.png) Hello! Very nice model, but I seem to be having some trouble with the files... Using it as an add-on and/or replace in single player LSPDFR seems to be crashing the game. Is there something that I am missing, like a gameconfig file, etc? The game and other models load-up fine, for some reason it's just this one.
Hello! Very nice model, but I seem to be having some trouble with the files... Using it as an add-on and/or replace in single player LSPDFR seems to be crashing the game. Is there something that I am missing, like a gameconfig file, etc? The game and other models load-up fine, for some reason it's just this one. -
 Any chance of the model being re-released? The Discord and imgur links don't work anymore.


.thumb.png.c1b5ef4e63b49835eafac2233921a5ff.png)
