Pdx
Members
-
Joined
-
Last visited
Everything posted by Pdx
-
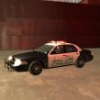
Great vehicle. The police department in my town just got some so I needed to get this one on GTA IV.
- 25 comments
- 5 reviews
-
Just wait until the US government starts to get involved. We will probably take the Ukraine's side because of how powerful Russia is and we will have ourselves another WW. Not saying it will happen just the likelihood of the US governments involvement is increasingly high considering President Obama told Russia to stay out. FULL STATEMENT:
-
Considering the average american male is 6'2'', they would be able to almost "throw" themselves an extra 11 feet. I was thinking of long jumpers when I thought of the range so it would probably be within a 10-15 foot range.
-
Thanks man! It took more time to think about it than it did to type it to be completely honest. I changed Suggestion #3 about 5 or 6 times before I came up with what it currently is. Still have time to change it again lol.
-
-
I have a few ideas for new content in LCPDFR. SUGGESTIONS: Suspect Updates Takedown Methods ERS Code Utilization, Warrant Info, and Offense Remembrance Suggestion 1: Suspect Updates Ever wondered what happened to the people you arrested after they were hauled away? Well, I have an idea to help you solve the mystery. CONCEPT After arresting someone and either you or Prisoner Transport takes them off to jail for things such as drug possession, 1-2 in-game weeks later, you will get either an email or text message in-game about what exactly happened to them after they went to jail and if they are out of jail, it will tell you to keep a look out for them if the offense was serious. Offense severity will be huge in Suspect Updates. Sam put up a suggestion about Wanted Levels and it would pretty much play off of that system if it were implemented. I have placed the quoted thread from Sam below. Note: I take no credit for the idea of the Wanted Levels, I just came up with an idea based off of that suggestion. Suggestion 2: Takedown Methods This idea popped into my head when I was chasing a suspect, my Taser wouldn't reach and I didn't want to use lethal force. What about new Takedown Methods. Now, the Takedown Methods can be either on-foot or vehicle takedowns. TAKEDOWN METHODS Tackling (On-foot chases) Authorised Pit Maneuvers Frisk Takedowns (When suspect resists to cooperate during frisk searches) Tackling When the suspect resists arrest and starts to run on-foot, you would be able to tackle the suspect from a range of 15-20 feet. Successful Tackles will require the following: Must be within a range of 15-20 feet Suspect must run on-foot before the Tackle Takedown can be performed Unsuccessful Tackles will result in: Face dives Chance of losing sight of suspect Authorised Pit Maneuvers When the suspect flees in a vehicle, whether it's theirs or they stole it, you will be able to ask for a Pit Maneuver. Officers will give you an 'OK' when you have an open area or they will perform the Pit Maneuver if they are closer to the suspect than you are. Pit Maneuver Requirements: Suspect must flee(resist arrest) and be inside of a vehicle Suspect must have a Two Star Wanted Level(refer to quoted thread at the beginning) Officers must have an 'OK' in order to perform a Pit Maneuver You will be able to ask for a Pit Maneuver by holding down Caps Lock and hovering over the "Request Pit Maneuver" option. If successful, you will be able to enable Pit Maneuver(Key binds) and an animation like the Frisk animation will be performed. Failure to have the above requirements when requesting a Pit Maneuver will result in A.I. Officers to say "Negative." Frisk Takedown Methods There are multiple Frisk Takedown methods that real officers use everyday when the suspect resist arrest during the frisk. Listed below are brief descriptions on what a couple of those methods are and how they are performed in real police work. Rear Pull-down How it is performed: Rear Pull-down with Arm Compression How it is performed: These methods will only have one requirement which is that the suspect must resist arrest when in the frisking animation. Suggestion 3: Offense Remembrance/Warrant Information(Single Suspect) & Backup Response and Code Utilization Offense Remembrance would be a great thing to add into the game because if you have a suspect who was drunk driving but when and if you frisk them and they have drugs on them, LCPDFR should be able to remember what those offenses are and the officer should be able to report that to dispatch. Warrant Information is what I have been wanting in LCPDFR for a while. When you pull someone over, ask for their ID, and run their name, the amount of Warrants they have are available but you really cannot do anything about it besides ask them to step out of the car and arrest them. Backup Response Times are ridiculously slow in my opinion. I feel that if I called in backup, in the amount of time it takes them to arrive I could have already had the suspect in custody and then some. The amount of time it takes backup to respond should utilize the Codes that are given to dispatch. The codes below are real life ESR codes. Codes CODE 1: Non-emergency response. No lights or siren, following the flow of traffic. CODE 2: Non-life threatening emergency response. Use of emergency lights ONLY! Must come to a stop at red lights before proceeding through them. CODE 3: Life-threat response. Emergency traffic, or simultaneous use of lights and siren required in order to achieve a rapid response. In most circumstances this does allow the responding unit to ignore jurisdictional traffic laws, but does not allow the responding unit operate without due regard to safety. CODE 4: All clear or I am okay. Also used to tell another unit they can disregard. CODE 5: Area under surveillance. All marked units stay out of area. CODE 6: Calling for a cover unit(s). CODE 7: Lunch break. CODE 8: Confidential information. CODE 9: All non-emergency traffic stay off the radio. A beep transmits over the air every couple of seconds. CODE 0: Big emergency. All units in the area respond code 3 to the units' location. Caution Alpha: Possibly armed Caution Mike: Mentally unstable Caution Victor: Violent Anyways, those are my suggestions. I put a lot of time and effort creating this thread so any and all feedback is very much appreciated. Also, Sam, if you want me to remove your suggestion from this thread, just let me know in a PM. Thank you, Officer Yak
-
What I've noticed from adding in cars and what not is, when you place the .wtd and .wft files in OpenIV or SparkIV, the original texture of the car turns all white or somewhat white in the Model Viewer on the .wft file but when you load it into the game, the texture is completely different/what you original anticipated it to be(Black, blue, etc.) If you are making the car textures, it would probably be the same kind of thing. I know that when I have a car that is all white in the game, in the .wft viewer it looks chrome colored. I don't know for sure though if that is the same with texture making/model making(assuming you are either making a car model or making textures.)
-
You might but that doesn't mean everyone else does.
-
Hello and welcome to this short tutorial on how to fix ELS v7 (R02) with the standard copy of GTA IV(No EFLS) Step 1: Go into your GTA IV directory and find ELS.ini Step 2: Scroll down until you find Config Settings for Police 3-Police B Step 3: Replace this; Status = on with; Status = off Step 4: Save it and exit out Step 5: Launch the game and enjoy.