
Code Master
Members
-
Joined
-
Last visited
Files posted by Code Master
-
AeroBrake Engine Control
Overview
The AeroBrake Engine Control mod for GTA V ensures that the engine of planes remains on when the player applies the brakes, even when holding the S key. This mod enhances the realism and control over aircraft, preventing the unintended shutdown of the engine during braking maneuvers.
Features
- Engine Control During Braking: Ensures that when the player applies the brakes (by holding S or any other control bound to braking), the aircraft engine remains on, providing continuous power during braking.
- Seamless Integration: Automatically detects if the player is flying a plane and applies the control logic without any manual intervention.
- Smooth and Realistic: No interruption to gameplay or aircraft functionality. The engine stays on even when stopping or slowing down the plane.
Versions
V1.0.0 - Initial Release
Installation
Download the mod: Download the provided .dll file.
Install Script Hook V:
If you don't have it installed, download and install Script Hook V from Dev-C. Follow the instructions for installing Script Hook V. Install Script Hook V .NET:
Download and install Script Hook V .NET from GitHub. Ensure the ScriptHookVDotNet.asi file is in your GTA V root folder. Place the Script:
Place the AeroBrakeEngineControl.dll file in the scripts folder located in your GTA V directory. If the folder doesn't exist, create it. Example path:
Grand Theft Auto V/scripts/AeroBrakeEngineControl.dll
Launch the game: Start GTA V, and the mod will automatically apply its functionality.
Compatibility
This mod is designed for single-player mode using Script Hook V. It is not compatible with GTA Online and may result in a ban if used in multiplayer environments.
Credits
You are welcome to feature this mod in YouTube videos or other showcases. If you do so, please provide appropriate credit to the creators of this mod. Thank you!
Usage
Automatic Control: Once installed, the script will automatically detect when you're in an aircraft and pressing the brake. There is no need to manually activate the mod. Engine Always On: The plane's engine will never turn off due to braking, allowing you to have continuous power while controlling your aircraft.
Contact Us
Want to get in contact with us? Here are a couple places you can do so:
https://discord.gg/XcEHvPR9qA
Aircraft Model - https://www.gta5-mods.com/vehicles/eurofighter-typhoon-fgr-4-royal-air-force-add-on
- 241 Downloads
Updated -
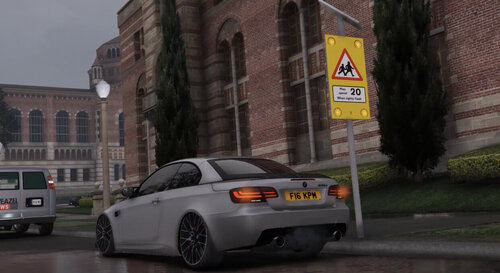
British Belisha Beacons & School Sign
Overview
This mod enhances the Belisha Beacons and School Signs in GTA V by adding realistic lighting effects, eliminating the need for a script. After extensive testing, we found that a script was no longer needed.
Important
Before proceeding with the installation, please back up your original game files. This will allow you to easily revert to your previous setup in case anything goes wrong. Additionally, we highly recommend using a mods folder to avoid corrupting your base game installation.
Features
- Belisha Beacons: The lights now flash continuously, day and night. For added realism, the brightness is set to:
- 10% at night
- 50% during the day
- School Signs: The lights flash only during peak school hours, from 7-9 a.m. and 3-5 p.m., replicating real-world operation.
Bugs
- None as of yet!
Installation
Download the provided `.oiv` (OpenIV package) file. Open OpenIV and switch to Edit Mode. Navigate to the Tools menu and select Package Installer. Select the downloaded `.oiv` file. Follow the on-screen instructions to install the mod. Note: Installing the mod via OpenIV will automatically add the modified files to your mods folder, ensuring that your base game files remain untouched.
Credits
You are welcome to feature these props in YouTube videos or other showcases. If you do so, please provide appropriate credit to the creators of this mod. Thank you!
Usage
Enjoy enhanced realism with the Improved Flashing System for Belisha Beacons and School Signs!
Contact Us
Want to get in contact with us? Here are a couple places you can do so:
https://discord.gg/XcEHvPR9qA
BMW MODEL - NOT FOR SALE ITS MY IRL CAR #872whp life
- 649 Downloads
- 3 Comments
Updated -
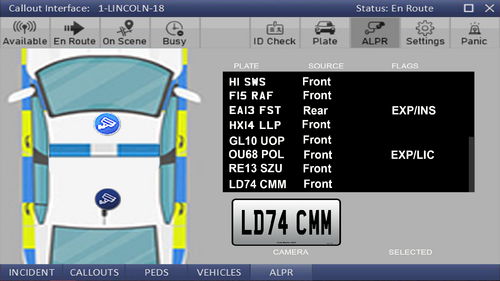
I decided to upload my british style version of Callout Interface, i will be editing this more so keep out for updates.
Sounds - When ANPR pings it says (ATTENTION)
Visuals - British style plates with font and colour changes to the interface
You will need this mod to use our files --
- 732 Downloads
- 2 Comments
Updated -
Universal Plate Formatter
Overview
This script enhances the vehicle number plates in Grand Theft Auto V (GTA V) by providing customization options and intelligent plate generation. It ensures a realistic representation of British traffic environments.
Features
Compatibility with various vehicle models and classes in GTA V. Dynamic adaptation of number plate styles based on vehicle class, such as trucks, military vehicles, and aircraft. Support for unique number plate formats for emergency vehicles, including police cars and helicopters. Real-time detection and adjustment of number plates for trailers, ensuring consistency across vehicle combinations. Extensive configuration options via an intuitive settings file for easy customization of number plate styles and behaviors.
I made this to work better with Callout Interface to give it the british number plate look! (Haven't tried any other ANPR/ALPR scripts)
Installation
1. Place the `UniversalPlateFormatter.dll` file into your GTA V *"scripts"* folder.
2. Ini file will be created once you load into game, then you can find our ini in `scripts\Code-Master\Configs\UniversalPlateFormatter.ini`
How to Use
Get into the game after installation! Once in, walk around and find vehicles, or spawn one yourself using in-game commands or mods. Enjoy the customized number plates on the vehicles you encounter!
- 1,091 Downloads
- 5 Comments
Updated -
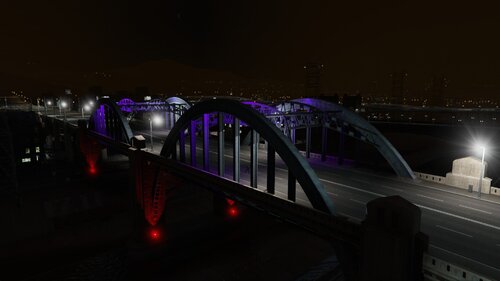
Colour Bridge Lights
Overview
The Colour Bridge Lights script is designed to enhance the visual experience in Grand Theft Auto V by adding dynamic lighting effects to certain bridges. Originally conceived as a simple script to create changing color lights on bridges, the project evolved into something more immersive and engaging.
Features
Dynamic Light Effects: Bridges are adorned with changing color lights to create a visually stunning environment. Police Wanted Level Integration: When a player is wanted by the police, the bridge lights switch to flashing blue and red to signify police presence. Customizable Light Settings: Various aspects of the lighting effects, such as color, intensity, and range, can be customized to suit individual preferences. Time-Based Behavior: The script intelligently adjusts the behavior of the lights based on the in-game time, providing a more realistic experience.
Installation
1. Make sure you have ScriptHookV & ScriptHookVDotNet
2. Place the `ColourBridgeLights.dll` & `ColourBridgeLights.ini` file into your GTA V *"scripts"* folder.
How to Use
Experience the enhanced visual effects as you traverse the designated bridges in the game. Watch as the lights change color or flash blue and red based on your actions and the time of day.
Configuration
POLICE_WANTED: This section allows you to specify the colors of the lights when the player has a wanted level. LightColour_1: Specifies the color of the first police light. Available colors are: "Red", "Green", "Blue", and others (see below). LightColour_2: Specifies the color of the second police light. Available colors are the same as LIGHT_1.
LIGHTSETTINGS: This section allows you to configure general settings for the script. OnAllTime: Specifies whether the lights should be active all the time (true) or only during certain hours of the day (false). NightHour: Specifies the hour at which the lights should turn on if OnAllTime is false. DayHour: Specifies the hour at which the lights should turn off if OnAllTime is false. LightIntensity: Specifies the intensity of the lights. LightRange: Specifies the range of the lights. LightShadow: Specifies the shadow strength of the lights.
Editing Light Colours
You can edit the colors of the lights by specifying the color names in the ColourBridgeLights.ini file. Available color options are: ***ONLY FOR POLICE LIGHTS***
>> "red", "green", "blue", "yellow", "orange", "purple", "white", "cyan", "magenta", "pink", "turquoise", "lime", "gray", "maroon", "teal", "navy", "indigo", "violet", "midnightblue", "chartreuse", "aqua", "coral", "salmon", "skyblue".
Note:
Make sure to enter the color names exactly as shown above, including capitalization.
Original Concept
The original idea behind the script was to introduce changing color lights on certain bridges to create a more vibrant and dynamic game world. However, as development progressed, we realized the potential to further immerse players in the game environment by integrating police wanted level mechanics into the lighting effects.
Future Development
While the current version of the script offers an exciting and immersive experience, there is always room for improvement and expansion. Future updates may include additional features, such as support for more bridges, enhanced visual effects, and further customization options.
Feedback and Contributions
We welcome any feedback or suggestions for improving the script. If you have ideas for new features or enhancements, feel free to contribute to the project or reach out to us with your suggestions.
Contact Us
Want to get in contact with us? Here are a couple places you can do so:
Discord | Tebex | UnionMods | GTA5Mods | LCDPFR | GitHub | Youtube
© SkyHigh Modifications 2021 - 2024
- 1,819 Downloads
Updated -
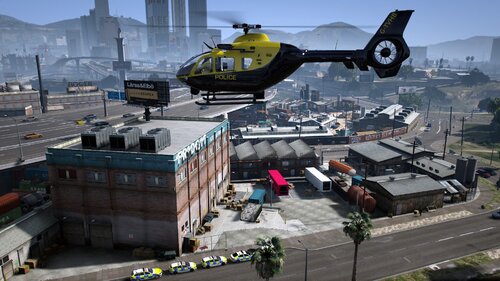
Helicopter Hover
Overview
This script is designed for Grand Theft Auto V (GTA V) to enable an automatic hover mode for helicopters. Players can engage and disengage the hover mode by pressing the `H` key. The script adjusts the helicopter's velocity, creating a hovering effect. Additionally, it provides visual notifications when the hover mode is activated or deactivated.
Features
Hover Activation: Press the `H` key to toggle the automatic hover mode for helicopters. Velocity Adjustment: The script adjusts the helicopter's velocity to create a hovering effect. Visual Notifications: When the hover mode is engaged or disengaged, a visual notification appears above the minimap. HUD Support: The script provides visual helicopter information like Speed, Altitude, Heading, etc (Press `O` to show or hide HUD).
Installation
Make sure you have http://www.dev-c.com/gtav/scripthookv/ and https://github.com/scripthookvdotnet/scripthookvdotnet-nightly/releases Place the `HelicopterHover.dll` & `HelicopterHover.ini` file into your GTA V *"scripts"* folder.
Usage
Launch GTA V and ensure ScriptHookV is loaded. In the game, press the default `H` key to toggle the automatic hover mode for helicopters and `O` key to toggle the HUD. Experience the hovering effect as the script adjusts the helicopter's velocity.
Contact Us
Want to get in contact with us? Here are a couple places you can do so:
Discord -- https://discord.gg/XcEHvPR9qA
- 1,955 Downloads
- 20 Comments
Updated -
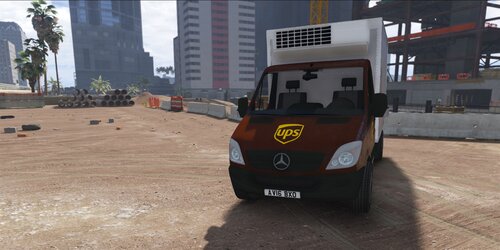
Required -
https://www.gta5-mods.com/vehicles/mercedes-sprinter-transport-unlocked-template
- 10 Downloads
- 1 Comments
Updated -
2020 Vauxhall Vivaro Thames Valley Police Skin
Download Model: https://www.gta5-mods.com/vehicles/2019-vauxhall-vivaro-syp
- 76 Downloads
Submitted -
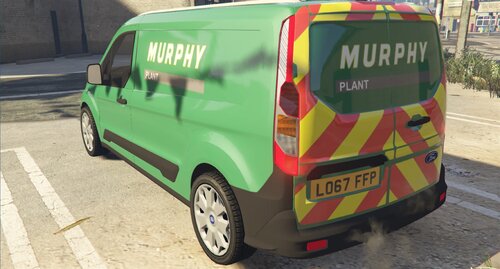
This skin, Murphy Plant Ford Connect Van 2017.
This model is best for Boxville
First Download (State Zero Mods) AA Pack
https://www.gta5-mods.com/vehicles/aa-rescue-and-recovery-pack-els
Model: James Radley
Setup: Cian Pearfield
Skin: KMODE
Eco lightbar made and textured by: D.Pease
Corner Modules made and textured by: D.Pease
- 27 Downloads
Submitted -
This is a UK British Veolia Ford Connect Van
Link for model
https://www.gta5-mods.com/vehicles/royal-mail-ford-connect-van-replace-template
Copy the YTD file to X64e.rpf > Levels > gta5 > vehicles.rpf
Credit
- NotchApple (https://www.gta5-mods.com/users/NotchApple)
Any questions please feel free to comment or message me thx.
- 13 Downloads
Submitted -
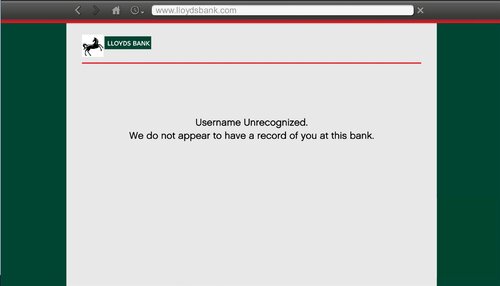
LLOYDS BANK WEBSITE PAGES
I got really bored tonight and decided to do something different to my game, and wanted to share it with you guys. This changes the Maze Bank web pages
Read Me in download.
If possible I want to change the www.maze-bank.com in the last photo to Lloyds but I'm currently trying to research about that, if I can do it a new update will be out for you guys
Really Hope you enjoy
Feedback would be appreciated!
- 18 Downloads
Submitted -
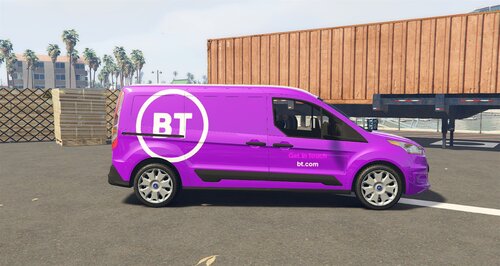
This a UK British BT Van.
Link for model
https://www.gta5-mods.com/vehicles/royal-mail-ford-connect-van-replace-template
Copy the YTD file to X64e.rpf > Levels > gta5 > vehicles.rpf
Credit
- NotchApple (https://www.gta5-mods.com/users/NotchApple)
-(BT Van New Logo) Folder - This is the 2019 New logo
-(BT Van Old Logo) Folder - This is the original logo
-Photo's inside both folders so you can see what van is what.
So you can pick which van you like.
Hope you enjoy this update, any issues let me know!
- 123 Downloads
Updated -
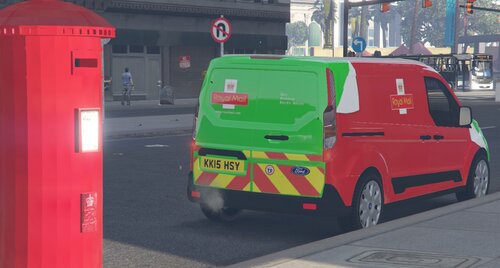
This is a skin of NotchApple's Royal Mail van to a Royal Mail Zero Emission Van
First Download
https://www.gta5-mods.com/vehicles/uk-london-british-dpd-ford-connect-van-wip-project-london-remastered
In the download file there is 2 Folder
Green - Green Van
Red and Green - Red and Green Van
Read Me in the installation file!
Credits:
Skin: KMODE
Original Model: NotchApple
Screenshots: KMODE
let me know if there are any problems
- 41 Downloads
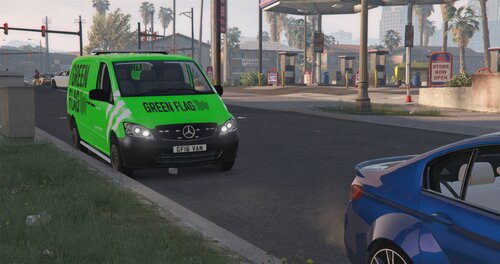
Submitted -
First Download
https://www.gta5-mods.com/vehicles/mercedes-vito-convoi-exeptionnel-els
Replace the YTD files
Credits:
Model: Unity
Model converterd by TeamMOH, (Marco)
Wheels: Britishgamer88 / TeamMOH (Dyverze and Samtoxie)
Skin: KMODE
Lightbar: GTAxB0SS
LED's grill and back: Bueno / OfficerFive0
Placement lights and retextures: WorldMC (Marco)
Screenshots: KMODE
Enjoy this skin, let me know if there are any problems and ill fix them asap
Thank You
- 5 Downloads
Submitted -
Thames Water 2020 Van SKIN
This model is best for Boxville
First Download (State Zero Mods) AA Pack
https://www.gta5-mods.com/vehicles/aa-rescue-and-recovery-pack-els
Model: James Radley
Setup: Cian Pearfield
Skin: KMODE
Eco lightbar made and textured by: D.Pease
Corner Modules made and textured by: D.Pease
- 31 Downloads
Submitted