


LibertyDesigns
-
Joined
Everything posted by LibertyDesigns
-
From the album: Eye Candy
-
From the album: Eye Candy
-
From the album: Eye Candy
-
From the album: Eye Candy
-
From the album: Eye Candy
-
From the album: Eye Candy
-
From the album: Eye Candy
-
From the album: Eye Candy
-
From the album: Eye Candy
-
From the album: Eye Candy
-
-
 Rarely do I ever put another artist's textures in my game since i'm always designing them. This is the rare occasion that I do. Freaking amazing!
- 2 comments
- 3 reviews
-
.thumb.png.527451909aaec993e789084e6333ab1f.png) most recent in your game. there are plenty of tutorials on youtube. it's the same for all packs.
most recent in your game. there are plenty of tutorials on youtube. it's the same for all packs.- 6 comments
- 4 reviews
-
 Can't include the model files.
 -
Guide to Writing a Quality File Description For modification developers on LCPDFR.com T. Jennings | October 2018 https://www.lcpdfr.com/profile/341940-t-jennings/ This work is copyrighted. Any unauthorized exploitation, modification, or reproduction by any means is strictly prohibited and will result in consequence. The contributors to this file will not be held responsible for any damage this guide causes if it is used for any means other than it’s intent. Introduction: This guide is aimed at assisting you in writing a descriptive and informative file description for your mod’s web page. In this guide you’ll find the process of; what information to include, formatting, and file archive structure. To begin, it’s suggested to draft a template of sorts in a word document. Make sure your document is set up so all information is easy to find and able to be understood. Title: When drafting your title, be sure it explains your file in 8 words or less. Attempt to avoid a prolonged title, as it drives traffic away from your download page. Viewers want to know what they’re clicking on, this is why a short, but descriptive title is preferred. Author’s Note: Viewers like knowing some background information on the file they’re looking to download. When drafting your file’s description, be sure to include a short author’s note explaining what the file is, the inspiration behind it, etc. It adds to the connection between an author and his file users. It’s suggested to have at least a paragraph for your author’s note. File Information: Under file information, you should include general information about the file. That includes (but is not limited to); the mod’s inspiration, what other mods the file is compatible with, and any optionals that come in the file (i.e. red/blue lights, blue/blue lights). More Details: Include additional details about the file that may not be extremely important, but can be notable. This includes things such as amount of liveries, amount of vehicles, suggested system strength, etc. What’s Included: As self explanatory as it may sound, many people lack this in their file descriptions. What to include in this section of your file description: Type of vehicles Year of vehicle model Base vehicle model Any other immediate info to what’s included Disclaimers: To avoid being held responsible for someone not knowing how to install your mod, or misusing it, you really should add a disclaimer to your file description to prevent any chance of being responsible for fixing someone's game/system. In your disclaimer, you should include the following: Not to rip/steal your work(s) Do not exploit for any form of gain The file contributors will not be held responsible for possible damages Logo: Don’t be afraid to add the logo of your modding group, or even your own to the description! Logos match your work with you, and help people assign a look to an account. Rarely do people go out of their way to see who published a file, so if you include a visible logo in your upload, your work will more easily be remembered. Designing a “More Information File” Further customizing the look of your file’s web page T. Jennings | October 2018 https://www.lcpdfr.com/profile/341940-t-jennings/ This work is copyrighted. Any unauthorized exploitation, modification, or reproduction by any means is strictly prohibited and will result in consequence. The contributors to this file will not be held responsible for any damage this guide causes if it is used for any means other than it’s intent. Introduction: If you’ve been around LCPDFR.com for a little while, you may have noticed some authors (such as BxBugs123, Era Modding, Walters) have designed a custom image for their file description instead of the default text. You can do this as well, as long as you have a program to design a More Information File (MIF)! Suggestions: In order to create an easy to understand MIF, you must have all information gathered previously in the Quality File Description Guide. Once you have all of this information, it’s time to move on. Design: Design is completely up to the user, but make sure the format is easy to understand, as your main goal is to have as few obvious questions in your comment section. If you’re having trouble formatting, use this template: Category (in order): Info to Include: Author’s Note What’s this mod? Why’d you make it? What is the inspiration behind the mod? File Information Where/what is the mod based? For what other mods is this one compatible? More Details Include some additional details about the file that may not be pertinent, but are notable What’s Included Tell what you included in the file archive Uploading to LCPDFR: In order for your MIF to appear in it’s maximum (readable) size, you must first upload to imgur.com. Save your MIF as a PNG, then go to https://imgur.com/ and sign up or log in. Go to your images tab, upload your MIF. After it’s uploaded, click to open it. Once you click to open it, you should have a few links available to copy. Find the “BBCode” option, and copy it. Paste it into your file description on LCPDFR, and save. It should now pop up in your description.
-
I figured it out. I screwed something up in the process but re-started and it exported perfectly.
-
-
 Kachow
-
 No Passing
-
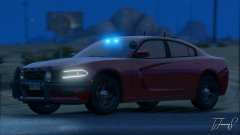
 I'm Blue
-
 Big Boy Car
-
 Ghost in the Shadows
-
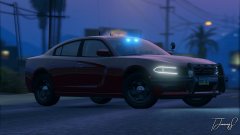
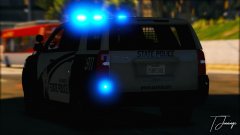
 Wee Woo
-
 Vroom Vroom
-
 Did Someone Call a Utility?
-
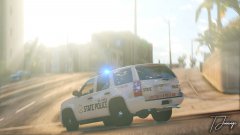 Look at The Pretty Sunset
-
 The Reflections Tho :0
-
 Beep Beep
-
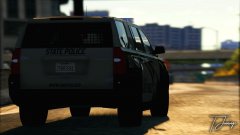
 In The City
-
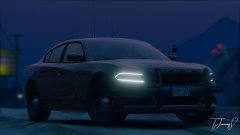
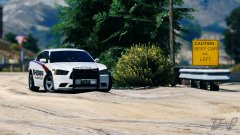
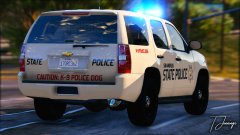
 Caution
-
 Bork Bork Nom Nom
-
 Had to Park Real Quick
-
 Passin' by
-
 On Patrol
-
 Bling Bling
-
 That's a Big City
-
 Move, Bitch - GET OUT THE WAY!
-
-
From the album: San Andreas State Police (Black & Grey)
-
From the album: San Andreas State Police (Black & Grey)
-
From the album: San Andreas State Police (Black & Grey)
-
From the album: San Andreas State Police (Black & Grey)
-
From the album: San Andreas State Police (Black & Grey)
-
From the album: San Andreas State Police (Black & Grey)
-
From the album: San Andreas State Police (Black & Grey)
-
From the album: San Andreas State Police (Black & Grey)


.thumb.png.527451909aaec993e789084e6333ab1f.png)


